Blog

  • Healthy Habits for Adults Over 50: Your Stronger Years Start Now

    Healthy Habits for Adults Over 50: Your Stronger Years Start Now

    Once I reached the point where healthy aging became more than a distant concern, I stopped thinking about wellness as a temporary project. I started viewing it as a way to protect my strength, energy, mobility, and independence.

    The most effective healthy habits for adults over 50 do not require extreme diets or exhausting workout programs. They involve consistent resistance training, nutrient-dense meals, restorative sleep, social connection, and proactive medical care. 

    Small improvements in these areas can help address age-related changes in muscle mass, metabolism, bone density, heart health, and cognitive function.

    Why Does Healthy Living Become More Important After 50?

    The body gradually changes with age. Adults may lose muscle, gain fat more easily, experience reduced bone density, and recover more slowly from physical activity. Hormonal changes, medication use, chronic stress, and disrupted sleep can also affect energy and wellbeing.

    These changes do not mean that physical decline is unavoidable. Regular exercise, balanced nutrition, preventive screenings, and meaningful social activity can help support longevity and preserve everyday function. I find it more motivating to focus on what I want to keep doing, such as traveling, climbing stairs, carrying groceries, gardening, or playing with family, rather than focusing only on disease prevention.

    How Can Strength Training Protect Muscle After 50?

    How Can Strength Training Protect Muscle After 50?

    Resistance training is one of the most valuable longevity habits because it helps preserve muscle strength, bone health, balance, and metabolic function.

    Adults should generally include muscle-strengthening activity at least two days per week. This may involve dumbbells, resistance bands, weight machines, or bodyweight movements such as squats, wall push-ups, step-ups, and supported lunges. The exercises should challenge the muscles while still allowing controlled, pain-free movement.

    Start With Functional Resistance Exercises

    I would begin with movements that support daily independence. Chair squats can make standing easier, rows can strengthen posture, and loaded carries can improve grip and total-body stability.

    Beginners should use manageable resistance and gradually increase repetitions or weight. Anyone with joint pain, heart disease, osteoporosis, or another medical condition should discuss a new exercise plan with a healthcare professional.

    How Much Cardio Do Adults Over 50 Need?

    Aerobic exercise supports heart health, endurance, blood pressure control, and healthy aging. Current US physical activity guidance recommends at least 150 minutes of moderate-intensity aerobic activity each week, along with strength training on two or more days.

    Brisk walking, cycling, swimming, dancing, and water aerobics can all count. I prefer choosing activities that feel realistic enough to repeat. A 30-minute walk five days a week may be easier to maintain than an ambitious routine that disappears after two weeks.

    You can also divide activity into shorter sessions. Consistency matters more than completing every minute in one workout.

    Why Are Balance and Flexibility Essential for Healthy Aging?

    Balance exercises help maintain stability and may reduce future fall risk. Flexibility and mobility work can also make everyday movements feel easier, especially when stiffness develops in the hips, ankles, shoulders, or spine.

    Simple practices include standing on one foot near a stable counter, walking heel to toe, performing gentle calf stretches, or practicing tai chi. Adults aged 65 and older are specifically encouraged to include balance-focused activity alongside aerobic and strengthening exercise.

    What Should Adults Over 50 Eat for Better Health?

    What Should Adults Over 50 Eat for Better Health?

    Nutrition after 50 should emphasize food quality rather than severe calorie restriction. As energy needs change, meals should provide concentrated nutrition through vegetables, fruits, whole grains, lean proteins, legumes, dairy or fortified alternatives, nuts, seeds, and healthy fats.

    Learning how to read ingredient lists on packaged foods can make it easier to compare products, spot added sugars, check sodium, and choose options that better support everyday nutrition.

    The National Institute on Aging recommends choosing a variety of nutrient-dense foods and protein sources such as seafood, poultry, beans, nuts, seeds, eggs, and soy products.

    Prioritize Protein at Every Meal

    Protein supports muscle repair and may help older adults maintain strength. I would spread protein across breakfast, lunch, and dinner instead of relying on one large serving at night.

    Greek yogurt, eggs, fish, chicken, cottage cheese, tofu, beans, and lentils are practical choices. Pairing protein with resistance training provides a stronger foundation for preserving muscle than relying on either habit alone.

    Get Enough Calcium and Vitamin D

    Calcium and vitamin D support skeletal health. Calcium needs vary by age and sex, and women generally require more calcium after age 50 than younger adults. Vitamin D also helps the body absorb calcium and contributes to bone health.

    Food sources may include milk, yogurt, fortified plant beverages, canned salmon with bones, tofu, and leafy greens. Supplements are not automatically necessary, so I would discuss personal needs, medications, and test results with a physician.

    Increase Fiber for Heart and Digestive Health

    Vegetables, fruit, beans, oats, nuts, seeds, and whole grains provide dietary fiber. Fiber supports digestion, helps with fullness, and contributes to cardiovascular and metabolic health.

    Increase fiber gradually and drink enough water, since suddenly adding large amounts can cause discomfort.

    Ask About Vitamin B12

    Some people over 50 have difficulty absorbing naturally occurring vitamin B12 from food. Fortified foods or supplements may be appropriate, but testing and medical guidance can help determine individual needs.

    How Can Adults Over 50 Stay Properly Hydrated?

    Thirst can become a less reliable signal with age, making intentional hydration important. I keep water visible and drink regularly with meals, medications, and physical activity instead of waiting until I feel extremely thirsty.

    Water, milk, unsweetened tea, soups, and water-rich produce can contribute to fluid intake. People with kidney disease, heart failure, or medically prescribed fluid restrictions should follow their clinician’s advice.

    Which Habits Support Brain Health After 50?

    Cognitive health depends on more than puzzles. Physical activity, quality sleep, blood pressure management, nutritious food, social engagement, and continuous learning all contribute to healthy brain function.

    Learning a language, playing an instrument, taking a class, volunteering, gardening, or trying a complex hobby can introduce mental novelty. I would choose activities that require attention, practice, and genuine curiosity rather than forcing myself through tasks I dislike.

    Why Do Social Connection and Sleep Matter?

    Why Do Social Connection and Sleep Matter?

    Regular contact with friends, relatives, neighbors, faith communities, clubs, or volunteer groups can provide emotional support and a stronger sense of purpose. Social connection also encourages movement, conversation, and mental stimulation.

    Most adults should aim for approximately seven to nine hours of sleep, although personal needs vary. A consistent bedtime, reduced evening caffeine, a cool bedroom, and less screen exposure before bed may improve sleep quality.

    Following healthy habits to reduce afternoon fatigue can also help you manage daytime energy through better hydration, balanced meals, movement breaks, and smarter caffeine timing. Persistent insomnia, loud snoring, or daytime exhaustion deserves medical attention.

    Which Preventive Screenings Matter After 50?

    Preventive care should be personalized according to age, sex, family history, medications, and existing health conditions. Annual medical visits offer a chance to review blood pressure, cholesterol, blood glucose, weight changes, mental health, and medication safety.

    Adults should also ask whether they are due for colorectal cancer screening, breast or cervical screening, prostate-related discussions, vision and hearing checks, dental care, or bone-density testing. Colorectal screening can identify growths before they develop into cancer, but the best screening method and timing depend on individual risk.

    Vaccination needs may include annual flu vaccination, shingles vaccination, updated COVID-19 vaccination, pneumococcal vaccination, or other immunizations recommended by a healthcare provider.

    What Is a Realistic Weekly Healthy Aging Routine?

    I would build a routine around repeatable actions rather than perfection. A practical week may include two full-body strength sessions, several brisk walks, short balance exercises, nutrient-dense meals, regular hydration, consistent sleep, and at least one meaningful social activity.

    The goal is not to overhaul everything immediately. Choose one habit, make it easy to repeat, and add another when the first begins to feel automatic.

    Frequently Asked Questions 

    1. What are the most important healthy habits for adults over 50?

    The most important priorities include resistance training, regular aerobic activity, adequate protein, fiber-rich foods, good sleep, social connection, hydration, preventive medical care, and avoiding tobacco.

    2. Is it too late to start exercising after 50?

    No. Adults can improve strength, endurance, balance, and mobility at many ages. Start gradually and seek professional guidance when medical conditions or previous injuries affect movement.

    3. How often should adults over 50 strength train?

    Most adults should perform muscle-strengthening activity at least twice weekly, allowing adequate recovery and gradually increasing resistance as their strength improves.

    4. What foods should people over 50 eat every day?

    Daily meals should emphasize vegetables, fruit, lean protein, whole grains, legumes, healthy fats, and calcium-rich or fortified foods while limiting excess sodium, added sugar, and highly processed foods.

    Stronger Years Start With Small Decisions

    I do not believe healthy aging comes from one perfect diet, supplement, or workout. It comes from protecting muscle, staying active, eating nourishing food, sleeping well, maintaining relationships, and keeping up with medical care.

    The best routine is the one I can continue. Starting with two strength sessions, a daily walk, a protein-rich breakfast, or a scheduled physical can create momentum. Each practical choice helps build a stronger, more energetic, and more independent future.


  • Healthy Habits for Nurses Working Long Shifts: Thrive Beyond the Scrubs

    By hour ten, even the smallest task can feel heavier than it did at clock-in. My feet ache, my focus starts to dip, and the coffee that helped earlier no longer feels like enough. Yet patients still need calm answers, careful decisions, and compassionate care.

    That is why I no longer treat recovery as something to think about only after a difficult week. I build simple habits into the full rhythm of my shift, from the way I prepare before work to how I eat, hydrate, move, decompress, and sleep afterward.

    The goal is not to follow a perfect wellness routine. It is to create realistic strategies that help me stay steady through demanding hospital floors, busy clinics, rotating schedules, and consecutive 12-hour shifts without ignoring my own physical and mental health.

    How Can Nurses Prepare for a 12-Hour Shift?

    My shift becomes easier to manage when I prepare before arriving at the unit. I organize my meals, uniform, water bottle, and sleep environment in advance, especially when I have two or three consecutive shifts.

    Protect a Consistent Sleep Anchor

    Most adults need at least seven hours of sleep in 24 hours, although individual needs vary. I aim for seven to nine hours and protect a regular sleep anchor—a block of sleep that remains as consistent as possible across workdays.

    I keep my bedroom cool, dark, and quiet. Blackout curtains, an eye mask, earplugs, or white noise can help when I need to sleep during daylight hours. After a night shift, reducing bright morning light may also make daytime sleep easier. Some nurses wear sunglasses on the commute home, but visibility and driving safety must always come first.

    Stop Caffeine Before It Disrupts Sleep

    Stop Caffeine Before It Disrupts Sleep

    Coffee can improve alertness temporarily, but it can also interfere with post-shift recovery. I use caffeine earlier in my shift rather than drinking it continuously.

    When possible, I stop drinking coffee, energy drinks, or caffeinated soda about six hours before my planned bedtime. Because people process caffeine differently, I adjust the timing if I notice that I am struggling to fall asleep.

    Use Strategic Naps When They Are Permitted

    A short nap may help restore alertness during long or overnight shifts when workplace rules, staffing, and break coverage allow it. I keep a power nap to approximately 20 to 30 minutes so I am less likely to wake from deeper sleep feeling groggy.

    A nap does not replace adequate daily sleep. I treat it as a temporary fatigue-management strategy rather than permission to begin a shift already sleep-deprived.

    What Should Nurses Eat During a Long Shift?

    Meal timing and food quality can affect how steady my energy feels. I avoid relying entirely on vending-machine snacks, pastries, or energy drinks because they may provide a quick lift followed by another crash.

    Start With a Balanced Pre-Shift Meal

    Before a day shift, I may eat oatmeal with fruit and Greek yogurt, whole-grain toast with eggs, or another breakfast that combines complex carbohydrates, protein, and fiber. Before an evening or night shift, I choose a balanced meal that satisfies me without feeling overly heavy.

    Starting work well-fed reduces the chance that I will become extremely hungry before my first available break.

    Pack Protein-Rich Snacks for Unpredictable Breaks

    I bring portable foods such as nuts, hard-boiled eggs, hummus, Greek yogurt, cheese, fruit, roasted chickpeas, or whole-grain crackers. Pairing protein or healthy fat with a fiber-rich carbohydrate usually keeps me satisfied longer than eating candy or refined snacks alone.

    Meal prep for nurses does not need to be elaborate. Repeating a few reliable meals during consecutive shifts can save time and reduce decision fatigue.

    Be Careful With Overnight Meal Timing

    The CDC’s NIOSH training for nurses recommends reducing food intake between midnight and 6 a.m. when possible and avoiding sugar-rich, low-fiber foods that may increase sleepiness. During overnight hours, I choose lighter options such as yogurt, fruit, vegetables, eggs, nuts, soup, or a whole-grain sandwich instead of a large greasy meal.

    I still respond to hunger and personal medical needs. The goal is not to skip necessary nourishment but to avoid meals that leave me uncomfortable or sluggish.

    How Can Nurses Stay Hydrated During Busy Shifts?

    How Can Nurses Stay Hydrated During Busy Shifts?

    Waiting until I feel extremely thirsty rarely works on a demanding floor. I keep a dedicated reusable water bottle nearby where workplace policies permit and use regular events as hydration cues.

    For example, I may drink water at the start of every hour, after completing charting, or whenever I return to the nurses’ station. Small, consistent amounts often feel more manageable than trying to drink a large volume at once. Nurses with fluid restrictions or other health conditions should follow individualized medical advice.

    How Can Nurses Reduce Foot, Back, and Shoulder Pain?

    Standing, walking, lifting, and repositioning patients can place considerable strain on the body. Supportive footwear matters more than price or branding, so I look for nursing shoes that fit correctly, provide stable cushioning, and suit my work environment.

    Compression socks may help some nurses manage leg discomfort or swelling, but they should fit properly and may not be appropriate for everyone. I seek professional guidance when I have circulatory concerns or persistent swelling.

    Use 60-Second Movement Breaks

    When I find a quiet moment, I use it for calf raises, shoulder rolls, gentle hamstring stretches, ankle movements, or posture resets. These micro-moments do not replace proper breaks, but they can interrupt long periods of muscle tension.

    Never Sacrifice Safe Patient-Handling Practices

    I avoid twisting, reaching awkwardly, or attempting a transfer that requires more help than I have. I engage my core, position equipment correctly, request assistance, and use mechanical lifts or transfer devices according to facility policy.

    OSHA emphasizes that lifting equipment and safe patient-handling programs are important for reducing injuries among healthcare workers. Protecting my body is not a sign of weakness; it supports a longer and safer nursing career.

    Which Mental Health Habits Help Nurses Prevent Burnout?

    Emotional recovery deserves the same attention as food, sleep, and movement. Difficult patient outcomes, staffing pressures, alarms, interruptions, and family interactions can keep my nervous system activated long after clocking out.

    Practice Box Breathing During High-Stress Moments

    When circumstances allow, I inhale for four seconds, hold for four, exhale for four, and hold again for four. Repeating this pattern for several cycles can help me slow down and regain focus during an intense moment.

    I use breathing as a grounding technique, not as a substitute for solving workplace safety concerns or seeking mental health support.

    Create a No-Work Buffer After Clocking Out

    Before transitioning into home responsibilities, I give myself approximately 10 minutes to sit quietly, listen to music, take slow breaths, or decompress during a safe part of my commute. This buffer helps me separate professional responsibilities from my personal life.

    If a shift leaves me too drowsy to drive safely, I do not try to push through. I rest, arrange transportation, or ask someone for help.

    How Should Nurses Recover Between Consecutive Shifts?

    How Should Nurses Recover Between Consecutive Shifts?

    During a block of long shifts, I simplify my routine. I prepare food and uniforms ahead of time, postpone optional errands, reduce intense exercise, and communicate my sleep needs to the people I live with.

    The most sustainable healthy habits for nurses working long shifts are often the least complicated. A prepared meal, a protected sleep window, a short mobility session, and a calm post-shift routine can be more valuable than trying to complete an ambitious wellness checklist.

    What Should Nurses Do on Their Days Off?

    I avoid turning every day off into a productivity marathon. I make room for gentle exercise, strength training, hobbies, social connection, meal preparation, and activities that have nothing to do with healthcare. A simple morning stretching routine for flexibility can also help me ease stiffness and reconnect with my body without making recovery feel like another demanding task.

    These personal experiences remind me that nursing is an important part of my identity, but it is not my entire identity. Rest, relationships, and enjoyable movement can support nurse burnout prevention and help me return to work feeling more grounded.

    Frequently Asked Questions (FAQs)

    1. What are the best healthy habits for nurses working long shifts?

    The best strategies include protecting at least seven hours of sleep, planning balanced meals, packing protein-rich snacks, hydrating regularly, timing caffeine carefully, wearing supportive footwear, using safe patient-handling equipment, and creating a consistent recovery routine.

    2. How can nurses maintain energy during a 12-hour shift?

    I combine a balanced pre-shift meal with water, protein-rich snacks, carefully timed caffeine, brief movement breaks, and proper rest before work. Steady routines generally work better than depending on sugar or energy drinks.

    3. Are 20-minute naps helpful for night-shift nurses?

    Short naps may improve temporary alertness when they are allowed and safely covered. However, nurses should follow employer policies and remember that a power nap cannot replace sufficient daily sleep.

    4. When should a nurse seek professional support for fatigue?

    Persistent insomnia, emotional numbness, frequent headaches, excessive caffeine dependence, difficulty concentrating, or drowsiness that affects work or driving deserves attention from a healthcare professional, supervisor, employee assistance program, or sleep specialist.

    Building a More Sustainable Nursing Routine

    I cannot control every emergency, staffing decision, or interrupted break. I can, however, create a flexible system that supports my body before, during, and after each shift.

    Small actions become meaningful when I repeat them. Protecting sleep, packing nourishing food, drinking water, moving safely, and allowing myself to recover help me care for patients without completely neglecting myself. Self-care cannot correct unsafe working conditions, but it can strengthen the foundation I rely on throughout a demanding nursing career.

  • Healthy Habits to Reduce Afternoon Fatigue and Beat the 3 P.M. Slump 

    Healthy Habits to Reduce Afternoon Fatigue and Beat the 3 P.M. Slump 

    By 2:30 p.m., my energy used to disappear as if someone had flipped a switch. My inbox looked longer, my focus felt slower, and even simple tasks seemed to require extra effort. I blamed lunch, work pressure, or poor motivation, but the real issue was usually a mix of sleep, hydration, food choices, and too much sitting.

    Once I started practicing healthy habits to reduce afternoon fatigue, the second half of my day became far more manageable. I no longer rely on sugar or endless coffee to push through the 3 p.m. slump. Instead, I use simple strategies that support my natural energy rhythm and help me stay focused without feeling wired or exhausted.

    Why Do I Feel Tired Every Afternoon?

    The early afternoon energy dip is partly biological. Your circadian rhythm influences alertness throughout the day, and many people naturally feel sleepier between approximately 1 p.m. and 3 p.m. Poor sleep, dehydration, stress, an oversized lunch, and uninterrupted screen time can make this normal dip feel much stronger.

    Nighttime sleep also shapes next-day energy. Most adults need at least seven hours of quality sleep, although individual needs vary. Keeping regular bedtimes and wake times can improve sleep quality, while afternoon caffeine may interfere with nighttime rest.

    Learning how modern lifestyles quietly damage sleep quality can also reveal how late screen use, irregular routines, and constant stimulation contribute to daytime tiredness.

    What Should I Eat to Prevent an Afternoon Energy Crash?

    Start With a Protein-Rich Breakfast

    Skipping breakfast does not automatically cause fatigue for everyone, but I notice steadier energy when my first meal contains protein and fiber. A practical target for many people is approximately 15 to 20 grams of protein, although personal needs depend on body size, activity level, health, and total daily intake.

    Greek yogurt with berries, oatmeal with nuts, cottage cheese with fruit, eggs with whole-grain toast, or a bean-and-vegetable breakfast bowl can provide more staying power than a pastry or sweetened coffee alone. Protein and fiber digest more slowly and may help control hunger before lunch.

    Choose a Low-Glycemic, Balanced Lunch

    A heavy lunch built around refined starches and fried foods can increase post-lunch tiredness. I prefer a moderate portion containing lean protein, high-fiber carbohydrates, vegetables, and healthy fat.

    A grilled chicken salad with beans, a quinoa bowl with vegetables, or a turkey wrap with avocado provides a better balance than a large plate of white pasta or fast food. Mayo Clinic Press specifically recommends increasing protein and fiber to help prevent an afternoon crash.

    Portion size matters as much as food quality. Even nutritious meals may leave you sluggish when you eat past comfortable fullness.

    Avoid Midday Sugar Spikes

    Avoid Midday Sugar Spikes

    Candy, soda, sweetened coffee, and vending-machine snacks may deliver a rapid burst of energy, but that lift rarely lasts. Highly processed carbohydrates can contribute to sharp blood sugar changes, particularly when eaten without protein or fiber.

    When I want something sweet, I pair it with a meal or a nutrient-dense snack rather than eating it alone. Protein and fiber can slow the rise in blood glucose after sugar consumption.

    Snack on Protein and Fiber

    If genuine hunger appears between lunch and dinner, choose food that supports sustained energy. Walnuts, almonds, Greek yogurt, fresh fruit with peanut butter, roasted chickpeas, or whole-grain crackers with cheese are practical options widely available in American offices and grocery stores.

    Snacking is not mandatory. It works best when hunger, rather than boredom or stress, is reducing your concentration.

    How Can Hydration and Caffeine Improve Afternoon Energy?

    Frontload Your Water Intake

    Mild dehydration can contribute to tiredness, headaches, and difficulty concentrating. I start drinking water in the morning instead of trying to catch up after the afternoon slump arrives.

    Keep a reusable bottle on your desk, drink water with meals, and increase your intake during exercise or hot weather. Water needs differ, so use thirst, activity, climate, and urine color as practical guides. Drinking water helps prevent dehydration, while sugary drinks add calories with little nutritional value.

    Delay Coffee Only When It Helps You

    Some wellness advice recommends waiting 90 to 120 minutes after waking before drinking coffee. This may suit people who feel better after allowing morning alertness to rise naturally, but it is not a universal requirement.

    I treat delayed coffee as an experiment rather than a strict rule. If waiting improves your energy without causing headaches or discomfort, keep doing it. If it does not, focus instead on total caffeine intake and sleep quality.

    Set an Early-Afternoon Caffeine Curfew

    Set an Early-Afternoon Caffeine Curfew

    A 2 p.m. caffeine cutoff is a simple starting point for many adults. However, caffeine sensitivity varies, and some people may need to stop earlier.

    Late coffee and energy drinks can make it harder to fall asleep or sleep deeply, which may worsen fatigue the following afternoon. The CDC recommends avoiding caffeine in the afternoon or evening as part of healthy sleep habits.

    What Movement Habits Stop the 3 P.M. Slump?

    Take Five-Minute Microbreaks

    Sitting and concentrating for hours can make both physical and mental fatigue feel worse. Following healthy habits for people who work from home can make it easier to build movement, hydration, and screen breaks into a busy day.

    I try to take a five-minute microbreak each hour to walk down the hallway, stretch, refill my water, or perform simple desk yoga. 

    A short walk after lunch combines movement with a mental reset. You do not need an intense workout. Consistent light activity can be more practical during a standard US workday.

    Seek Natural Sunlight After Lunch

    Step outside or sit near a bright window for about 10 minutes after eating. Daylight can support alertness and reinforce the body’s day-night signals. Henry Ford Health notes that sunlight may inhibit melatonin production and help counter midday drowsiness.

    When outdoor access is limited, turn on brighter workplace lighting and avoid spending the entire afternoon in a dark room.

    Practice the 20-20-20 Rule

    Digital eye strain can feel like general exhaustion. Every 20 minutes, look at something approximately 20 feet away for at least 20 seconds.

    I also close unnecessary browser tabs and silence nonessential notifications. Switching from work to social media does not provide the same mental break as stepping away from a screen.

    Can a Power Nap Reduce Midday Fatigue?

    Can a Power Nap Reduce Midday Fatigue?

    A tactical 15-to-20-minute nap between 1 p.m. and 3 p.m. may improve alertness without causing the heavy grogginess associated with longer naps. Set an alarm and nap in a quiet, comfortable place when your schedule allows.

    Avoid sleeping too late or for too long because daytime naps may interfere with nighttime sleep. People who already struggle with insomnia may benefit more from improving their sleep schedule than adding a daily nap.

    A Simple Afternoon Energy Routine That Works

    My routine starts with a balanced lunch and a glass of water. I walk outside for five to ten minutes, return to one clearly defined task, and take a screen break before fatigue becomes overwhelming. If hunger appears later, I choose fruit, yogurt, nuts, or another protein-and-fiber snack.

    These healthy habits to reduce afternoon fatigue work best when repeated consistently. Trying one change for a week makes it easier to tell whether meal size, hydration, caffeine timing, movement, or sleep is affecting your energy.

    When Should Persistent Afternoon Fatigue Concern Me?

    Occasional afternoon tiredness is common. Speak with a healthcare professional when fatigue lasts several weeks, becomes severe, affects safe driving, or occurs with shortness of breath, dizziness, unexplained weight changes, mood changes, pain, or other concerning symptoms.

    Persistent fatigue can have many causes, including sleep disorders, anemia, thyroid problems, medication effects, anxiety, depression, and other health conditions. Lifestyle changes cannot replace an appropriate medical evaluation.

    Frequently Asked Questions 

    1. What are the best healthy habits to reduce afternoon fatigue?

    Prioritize consistent sleep, a protein-rich breakfast, a moderate low-glycemic lunch, regular water intake, early caffeine timing, hourly movement, daylight exposure, screen breaks, and short naps when appropriate.

    2. Why do I crash around 3 p.m. even after sleeping well?

    Your circadian rhythm naturally lowers alertness during the early afternoon. A large lunch, dehydration, limited movement, stress, or prolonged screen use may intensify that biological dip.

    3. What is the best snack for afternoon brain fog?

    Choose a snack containing protein and fiber, such as an apple with peanut butter, Greek yogurt with berries, nuts with fruit, or hummus with vegetables.

    4. Is coffee or a power nap better for afternoon tiredness?

    Either may provide temporary relief. A short nap avoids additional caffeine, while coffee may be more practical at work. Consider how each option affects your nighttime sleep.

    Take Back the Second Half of Your Day

    I no longer treat afternoon fatigue as an automatic reason to reach for sugar or another oversized coffee. A lighter lunch, earlier hydration, regular movement, natural light, and better sleep create a much more reliable foundation for steady energy.

    Begin with the habit that addresses your most likely trigger. Adjust your lunch if you feel tired after eating, move more if you sit all morning, or reconsider afternoon caffeine if you sleep poorly. Small, repeatable changes can make your afternoons more focused, productive, and manageable.

  • Low Impact Cardio Workouts at Home for Everyday Fitness

    Low Impact Cardio Workouts at Home for Everyday Fitness

    Finding time to exercise can feel impossible, especially when running or jumping leaves your knees complaining. That is exactly why low impact cardio workoutsat home have become my favorite way to stay active. These simple movements increase your heart rate, improve endurance, and protect your joints, making fitness feel achievable for beginners and experienced exercisers alike.

    Key Takeaways

    • Low impact workouts protect your joints while improving heart health.
    • No equipment is needed for an effective home routine.
    • Short sessions performed consistently deliver excellent results.
    • Small changes in speed can increase workout intensity.
    • Proper form is more important than moving fast.

    Making Low Impact Cardio Effective

    Understanding how these exercises work helps you get better results.

    Your Heart Still Works Hard

    Low impact simply means at least one foot stays in contact with the ground. It does not mean the workout is easy. By using continuous movements and large muscle groups, your heart rate rises naturally while reducing unnecessary stress on your joints.

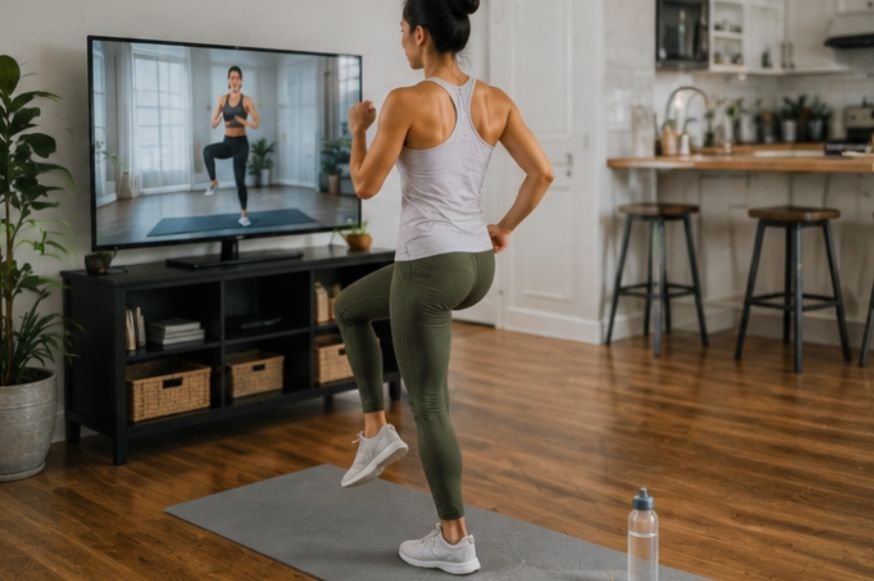
    Simple exercises like marching, side stepping, and standing knee drives can become surprisingly challenging when performed continuously. Increasing your arm movement and maintaining a steady pace creates an excellent cardiovascular workout without jumping.

    Perfect for Every Fitness Level

    These workouts work well for beginners, older adults, people returning after a break, or anyone recovering from minor joint discomfort. Since every exercise can be adjusted, you stay in control of the intensity instead of forcing your body beyond its limits.

    Even experienced exercisers often include low impact training on recovery days because it supports cardiovascular endurance while allowing muscles and joints to recover from harder workouts.

    Prepare for Success

    A little preparation makes every workout safer and more enjoyable.

    Create a Comfortable Workout Space

    Choose a flat area where you can move freely in every direction. Remove anything that might cause you to trip and wear comfortable athletic shoes with good support if your flooring is hard or slippery.

    Keep a water bottle nearby and make sure the room has enough fresh air. These simple steps help you stay comfortable throughout your session.

    Start with a Proper Warm Up

    Never rush into fast movements. Spend three to five minutes performing gentle arm circles, shoulder rolls, slow marches, heel taps, and side steps to wake up your muscles gradually.

    A proper warm up improves circulation, prepares your joints for movement, and reduces the chance of stiffness during your workout. Those few minutes often make the entire session feel smoother.

    How to Do Low Impact Cardio Workouts at Home

    How to Do Low Impact Cardio Workouts at Home

    Now comes the fun part where movement meets results.

    Begin with Simple Cardio Moves

    Start by marching in place while pumping your arms naturally. Lift each knee only to a comfortable height and maintain an upright posture. Continue for thirty to forty five seconds before moving to the next exercise.

    Perform low impact jumping jacks by stepping one foot sideways while raising your arms overhead instead of jumping. Alternate sides continuously to keep your heart rate elevated while protecting your joints.

    Modified speed skaters are another excellent choice. Step side to side while lightly tapping your back foot behind your body instead of leaping. This movement improves coordination while remaining gentle on your knees.

    Add More Dynamic Exercises

    Next, perform squat to front kicks. Complete a comfortable bodyweight squat, stand up, then extend one leg into a gentle front kick before repeating on the opposite side. Keep every movement controlled and avoid rushing.

    Standing bicycle crunches help strengthen your core while maintaining cardiovascular activity. Bring one elbow toward the opposite knee, then switch sides using slow, controlled movements. This exercise improves balance as well as coordination.

    Shadow boxing with light foot movement also keeps your heart working while engaging your upper body. Throw controlled punches while marching softly in place for an effective full body cardio challenge.

    Follow a Smart Workout Structure

    Begin every session with three to five minutes of warming up using light marching and arm circles.

    Perform each exercise continuously for thirty to forty five seconds, followed by ten to fifteen seconds of recovery. This timing keeps your breathing elevated while allowing enough recovery to maintain good form.

    Complete three total circuits to create an effective fifteen to twenty minute workout. Many experienced exercisers appreciate timed intervals because they provide structure while keeping intensity consistent throughout the session.

    Simple Ways to Increase Results

    Simple Ways to Increase Results

    Small adjustments often produce surprisingly big improvements.

    Increase Intensity Without Jumping

    Rather than adding impact, increase your walking speed, pump your arms more actively, or shorten your recovery periods slightly. These changes raise your heart rate while keeping the workout joint friendly, even with hip or knee pain.

    You can also increase your movement range by taking slightly wider steps or lifting your knees a little higher as your fitness improves. Progress gradually instead of making large jumps in difficulty.

    Listen to Your Body

    Feeling warm and breathing harder are completely normal during cardio exercise. Sharp pain, dizziness, or worsening joint discomfort are signals to stop and recover.

    Fitness improves through consistency rather than pushing through pain. Choosing modifications whenever necessary helps build a long lasting exercise habit that supports your health.

    Real Life Tips for Daily Success

    Real Life Tips for Daily Success

    Building healthy habits is easier than chasing perfection. Learning how to make frozen vegetables taste good and healthy can support the same practical approach by making balanced meals easier on busy days.

    Fit Exercise Into Busy Days

    Not every workout has to last an hour. Even fifteen to twenty minutes before breakfast, during lunch, or after work can improve your energy and cardiovascular health.

    Breaking longer workouts into two shorter sessions also works well for many people. Every minute of movement contributes toward your weekly activity goals.

    Mix Cardio with Strength Training

    Low impact cardio works even better when combined with simple strength exercises such as chair squats, wall push ups, glute bridges, and calf raises.

    Adding exercises for better posture at home can also improve core control, shoulder alignment, and body awareness during cardio movements. Strong muscles provide better support for your joints during daily activities.

    Alternating cardio and strength sessions throughout the week creates a balanced fitness routine that improves endurance, mobility, and overall health without overwhelming your body.

    Frequently Asked Questions

    1. What is the most effective low-impact cardio?

    The most effective low impact cardio depends on consistency and effort. Brisk walking, marching in place, step touches, cycling, swimming, and bodyweight home circuits all improve cardiovascular fitness while remaining gentle on your joints.

    2. What is the 3-3-3 rule for cardio workouts?

    The 3-3-3 rule commonly refers to balancing strength training, cardio sessions, and active recovery throughout the week. It encourages variety, supports recovery, and helps maintain a sustainable long term exercise routine.

    3. How to do low-impact cardio at home?

    Perform continuous movements such as marching in place, low impact jumping jacks, modified speed skaters, standing bicycle crunches, and squat to front kicks for timed intervals while maintaining controlled movement and proper posture.

    4. Is 20 minutes of cardio a day enough?

    Yes. Twenty minutes of moderate cardio each day can significantly improve heart health, endurance, and calorie expenditure. Combined with strength training and regular movement, it supports long term fitness goals effectively.

    Keep Your Heart Happy One Step at a Time

    The best low impact cardio workouts at home are the ones you actually enjoy enough to repeat every week. You do not need expensive machines, endless space, or high impact movements to become fitter. Start with simple exercises, move at your own pace, celebrate small improvements, and let consistency do the heavy lifting. Your heart, joints, and future self will all appreciate the effort.

  • How to Read Ingredient Lists on Packaged Foods Correctly

    How to Read Ingredient Lists on Packaged Foods Correctly

    A package can promise “natural,” “wholesome,” or “made with whole grains” while telling a different story on the back. Learning how to read ingredient lists on packaged foods helps me move past those claims and judge what the product actually contains.

    I do not search for a perfect label. I check whether the main ingredients suit my needs, whether added sugars dominate the recipe, and whether allergens or additives require closer attention.

    Why the Ingredient List Deserves Your Attention

    The Nutrition Facts panel shows amounts of nutrients per serving. The ingredient list reveals what manufacturers used to create the food. I read both because neither provides the complete picture alone.

    Under US labeling rules, ingredients generally appear in descending order by weight. The ingredient present in the greatest amount comes first, followed by ingredients used in smaller quantities.

    This ordering makes the beginning of the list especially useful. However, it does not mean the first three ingredients always form a fixed percentage of the product. Labels do not disclose each ingredient’s exact proportion.

    Front-label claims can still offer useful information, but I treat them as prompts rather than proof. I turn the package around before making a decision.

    How to Read Ingredient Lists on Packaged Foods

    How to Read Ingredient Lists on Packaged Foods

    The easiest method is to scan the label in a consistent order. I begin with the dominant ingredients, check added sugars and oils, and finish with allergens and additives.

    Start With the First Three Ingredients

    When learning how to read ingredient lists on packaged foods, start at the beginning rather than counting every item.

    The first few ingredients usually tell me the product’s basic structure. A whole-grain bread may begin with whole-wheat flour and water. A fruit snack may begin with corn syrup, sugar, and fruit concentrate.

    I ask three questions:

    1. Is the expected food the first ingredient?
    2. Do added sugars or refined starches appear near the top?
    3. Does the product contain ingredients that support its main claim?

    For example, a package labeled “multigrain” may contain several grains but still use refined wheat flour as its primary ingredient. “Multigrain” describes variety, not necessarily whole-grain content.

    Identify Added Sugars Without Memorizing Every Name

    Sugar can appear under many names, including sucrose, dextrose, corn syrup, honey, malt syrup, agave nectar, molasses, and concentrated fruit juice.

    Manufacturers must also declare added sugars in grams and as a percentage of Daily Value on most Nutrition Facts labels. This makes the Nutrition Facts panel more useful than trying to memorize every possible sugar term.

    I use the ingredient list to identify the source of sweetness. Then I use the Added Sugars line to measure its amount.

    Sugar appearing fourth instead of first does not automatically make a product low in added sugar. Several sweeteners may appear separately and occupy different positions.

    Check the Nutrition Facts Panel

    Knowing how to read ingredient lists on packaged foods also means knowing when to look beyond the list.

    The ingredient list cannot tell me how many grams of fiber, sodium, saturated fat, protein, or added sugar appear in one serving. I compare those amounts on the Nutrition Facts panel.

    I check the serving size first. A package may look like one portion while the label lists two or more servings.

    My priorities change with the product. For breakfast cereal, I may compare fiber and added sugar. For soup, I focus more on sodium. For a snack, I may check protein, fiber, and portion size.

    Ingredient lists explain composition. Nutrition Facts explain quantity.

    Find Fats and Oils

    The word “oil” does not automatically signal a poor choice. Olive, canola, sunflower, soybean, and avocado oils differ in composition, but each may appear in processed foods.

    I pay closer attention to partially hydrogenated oil because it has historically been a major source of artificial trans fat. The FDA has completed actions removing partially hydrogenated oils from most food uses, although small amounts of trans fat may still occur naturally or through other sources.

    A Nutrition Facts label may display zero grams of trans fat when a serving contains less than 0.5 grams because labeling rules allow that amount to round down.

    That makes serving size relevant. Eating several servings can increase the actual amount consumed.

    Review Allergens and Advisory Statements

    Review Allergens and Advisory Statements

    For anyone managing a food allergy, how to read ingredient lists on packaged foods becomes a safety skill rather than a general nutrition habit.

    US labels must identify the food source of the nine major allergens: milk, eggs, fish, crustacean shellfish, tree nuts, peanuts, wheat, soybeans, and sesame. Sesame joined the major-allergen list under the FASTER Act.

    An allergen may appear in parentheses after an ingredient, such as “whey (milk).” It may also appear in a separate “Contains” statement.

    When a Contains statement is used, it must name all major allergens present as ingredients.

    “May contain” or “processed in a facility” statements relate to possible cross-contact. They do not mean the allergen was deliberately added. People with diagnosed allergies should follow guidance from their healthcare team.

    Understand Additives Without Fearing Every Chemical Name

    A long or unfamiliar word is not automatic evidence that a food is harmful. Ascorbic acid is vitamin C. Alpha-tocopherol is a form of vitamin E. Lecithin helps ingredients mix, while xanthan gum affects texture.

    The FDA requires food ingredients to use their common or usual names. Color additives and other regulated ingredients must also appear when required.

    Instead of judging an ingredient by pronunciation, I ask what it does. Preservatives can slow spoilage. Emulsifiers help oil and water remain mixed. Fortification can replace or add nutrients.

    A short ingredient list can be convenient, but it is not a health guarantee. Butter may contain one ingredient while a fiber-rich cereal contains many. The full nutritional context matters more than list length.

    My Three-Pass Method for Reading Food Labels

    My Three-Pass Method for Reading Food Labels

    I developed a three-pass routine because reading every word in the grocery aisle became slow and frustrating.

    During the first pass, I identify the product’s foundation. I read the first three to five ingredients and decide whether they match what I expect to buy.

    During the second pass, I check my personal priorities. I may look for whole grains, added sugar, sodium, protein, fiber, or a specific oil.

    During the third pass, I complete the safety check. I review allergens, serving size, expiration information, and preparation instructions.

    This process usually takes less than a minute after some practice. It also prevents one ingredient from controlling the entire decision.

    I use the same approach when choosing ingredients for Easy no-cook lunches with protein and fiber. I compare canned beans, whole-grain crackers, yogurt, tuna, hummus, and prepared vegetables based on both composition and nutrient amounts.

    A Worked Peanut Butter Label Comparison

    Peanut butter provides a simple example of how to read ingredient lists on packaged foods.

    Product A lists peanuts and salt. Product B lists peanuts, sugar, palm oil, molasses, and salt.

    I would choose Product A when I want a basic peanut butter without added sweeteners or stabilizing oils. However, Product B is not automatically forbidden. It may offer the sweeter taste and no-stir texture someone prefers.

    Next, I compare serving size, added sugar, sodium, and saturated fat. If the differences are small and I enjoy Product B more, preference may influence my choice.

    This is the original rule I use: the ingredient list should inform the decision, not make the decision alone.

    Common Ingredient-List Mistakes

    One mistake is assuming every unfamiliar ingredient is dangerous. Scientific-sounding names often describe familiar vitamins, minerals, acids, or processing ingredients.

    Another mistake is believing fewer than ten ingredients always means healthier. No federal rule or strong universal standard makes ten ingredients a meaningful cutoff.

    I also avoid judging one ingredient without checking its position. Salt near the end usually contributes less weight than an ingredient listed first, although the exact quantity remains unknown.

    Finally, I never ignore serving size. A food can appear low in sugar or sodium until I calculate how many labeled servings I actually eat.

    Frequently Asked Questions

    1. What should I look for first on an ingredient list?

    Start with the first three to five ingredients because they appear in descending order by weight and reveal the product’s main composition.

    2. How can I identify hidden sugar on food labels?

    Check both the ingredient list for sweetener names and the Added Sugars line for grams and percentage of Daily Value.

    3. Does a short ingredient list mean a food is healthy?

    No. Ingredient count does not measure fiber, sodium, added sugar, portion size, nutrient density, or the overall quality of a food.

    4. How do I read food labels when I have allergies?

    Read the complete ingredient list and Contains statement every time because recipes and manufacturing practices can change.

    Read the Back, Then Own the Snack

    Once I understood how to read ingredient lists on packaged foods, grocery shopping became less about chasing perfect products and more about making useful comparisons.

    My next step is simple: I pick two similar products, read the first five ingredients, and compare one nutrient that matters to me. That small habit gives me more reliable information than any bold promise on the front.

  • Exercises for Better Posture at Home: A Simple Daily Routine

    Exercises for Better Posture at Home: A Simple Daily Routine

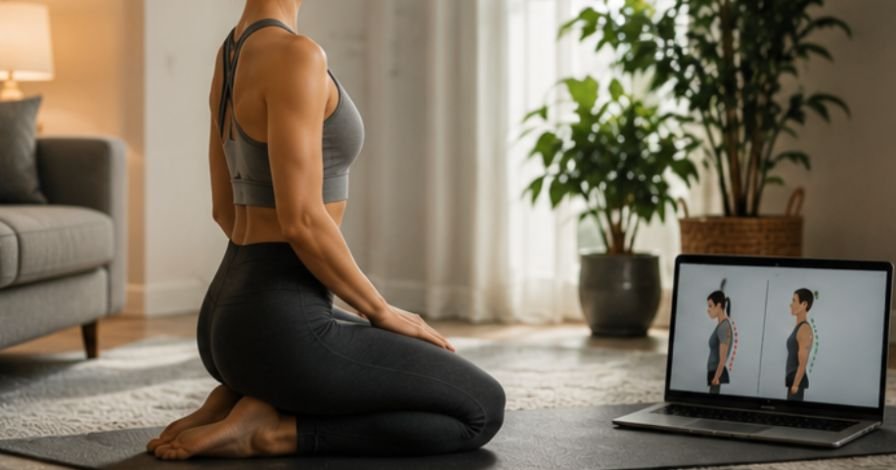
    Long hours at a desk can turn sitting into rounded shoulders, a stiff neck, and an aching back. My posture often slips after screen time, so exercises for better posture at home feel so practical. They need little space and only a few focused minutes.

    Good posture is not rigid. It helps your muscles support comfortable movement without forcing your body into one rigid position.

    Key Takeaways

    • Move slowly and focus on control.
    • Train your back, neck, core, and hips.
    • Stretch tight areas without forcing them.
    • Take movement breaks during long sitting periods.
    • Stop if you feel sharp pain or numbness.

    What Good Posture Does To You?

    These movements can make daily life more comfortable.

    Your Body Hates Being A Desk Ornament

    Exercises for better posture at home are necessary because your body is built to move, not freeze in a chair. Tight chest muscles, weak upper back muscles, and a forward head position can make even simple tasks feel tiring. A short routine wakes up sleepy muscles and gives your spine a much-needed change of scenery.

    Posture Affects Everyday Movement

    Poor alignment can influence how you lift groceries, climb stairs, use your phone, and even breathe. Rounded shoulders may limit comfortable arm movement, while weak core muscles can make your lower back work harder than necessary.

    Better body awareness helps you notice and change slouching habits before they become uncomfortable.

    Upper Body And Back

    Upper Body And Back

    These movements open the chest and support the shoulders.

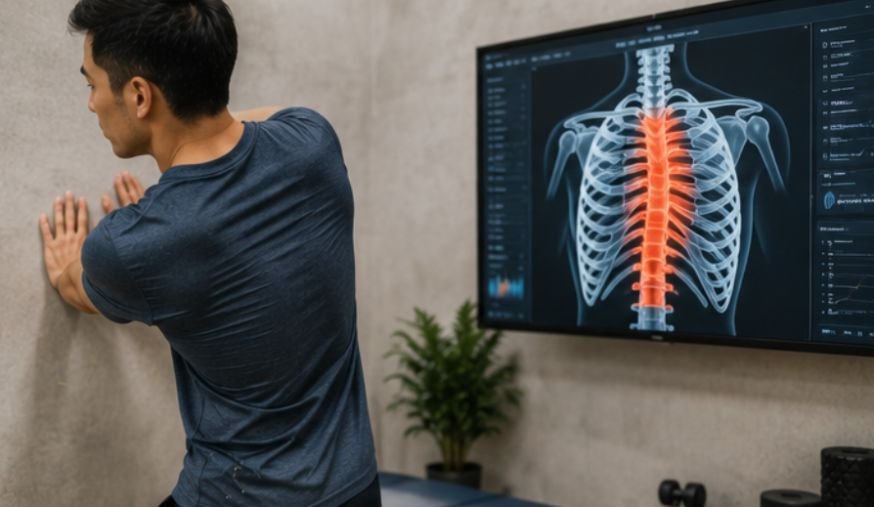
    Wall Angels

    Stand with your back, head, and hips against a wall. Move your feet slightly forward and bend your elbows to 90 degrees. Keep your ribs relaxed as you slowly slide your arms upward, then bring them back down.

    Continue for one to two minutes without forcing tight shoulders. Wall angels strengthen the mid-back and improve shoulder control after prolonged sitting.

    Chest Opener

    Stand tall and clasp your hands behind your lower back. Gently pull your shoulders down and back while lifting your chest slightly. Keep your neck relaxed and avoid arching your lower back.

    Hold for five slow breaths and repeat five times. This stretches the chest and supports relaxed shoulder positioning. Use a towel if clasping your hands feels uncomfortable.

    Spine And Core

    Spine And Core

    These exercises mobilize the spine and strengthen the core.

    Cat-Cow Stretch

    Begin on your hands and knees with your wrists under your shoulders and knees under your hips. Breathe out as you round your back toward the ceiling and gently lower your head. Then breathe in as you lower your belly and lift your chest.

    Repeat for one minute through a comfortable range. Cat-Cow reduces stiffness and prepares your back for strengthening work.

    Bird Dog

    Stay on your hands and knees. Tighten your abdomen gently, then reach your right arm forward while extending your left leg backward. Keep your hips level and avoid twisting your body.

    Hold for three seconds, return, and switch sides for two minutes. Bird Dog strengthens the core, glutes, shoulders, and back while building spinal control.

    Neck Alignment

    These movements address screen-related forward head posture.

    Chin Tuck

    Sit or stand tall with your eyes looking forward. Pull your chin straight backward as though you are making a double chin. Keep your head level and avoid looking down.

    Hold for five seconds and repeat ten times. The movement should feel gentle, not forceful. Chin tucks activate deep neck muscles and improve awareness of where your head sits over your shoulders.

    Shoulder Reset

    Let your arms hang naturally beside your body. Lift your shoulders toward your ears, roll them backward, and allow them to settle down. Repeat five slow times while breathing normally.

    This reset may ease tension after typing or phone use. Keep the movement relaxed rather than squeezing your shoulder blades forcefully.

    How To Use The Routine

    Use this order for a practical home workout.

    Build A Ten-Minute Session

    Start exercises for better posture at home with one minute of Cat-Cow to loosen your spine. Move to Wall Angels for one minute, followed by five Chest Opener repetitions. Complete ten Chin Tucks before performing Bird Dog for two minutes.

    Finish with Shoulder Resets and a short walk around the room. Rest whenever your form becomes sloppy. A controlled ten-minute routine is more useful than a rushed workout filled with extra repetitions.

    Choose A Realistic Schedule

    Perform the complete routine three to five times each week. On busy days, choose Wall Angels, Chin Tucks, and Cat-Cow for a quick three-minute movement break.

    Consistency matters more than intensity. Build endurance gradually rather than doubling the routine during your first week.

    Fit It Into Daily Life

    Set a reminder to stand every 30 to 60 minutes. Walk briefly, stretch your chest, or complete a few Chin Tucks. These breaks prevent prolonged stillness.

    Keep your screen near eye level and your feet supported. Raise your phone toward your face instead of dropping your head.

    Planning easy no-cook lunches with protein and fiber can also make busy workdays feel more balanced without requiring extra preparation time.

    Common Posture Mistakes

    Common Posture Mistakes

    Avoid these errors for safer, better progress.

    Forcing A Straight Position

    Pulling your shoulders back constantly can create tension in your neck and upper back. Your spine has natural curves, so it should not look completely flat.

    Aim for relaxed alignment that still lets you breathe and move freely.

    Ignoring The Lower Body

    Posture is not controlled by the neck and shoulders alone. Your core, hips, legs, and glutes help support you during standing, walking, and lifting.

    Adding bodyweight back exercises at home can further strengthen the muscles that support your spine and shoulder blades. Add walking, squats, and glute bridges as your fitness improves. Whole-body strength supports more efficient movement.

    Exercising Through Pain

    Mild effort and a gentle stretch are normal. Sharp pain, numbness, tingling, dizziness, or weakness are warning signs.

    Stop if symptoms appear. Seek professional advice if pain persists, follows an injury, interrupts sleep, or worsens with movement.

    Frequently Asked Questions

    1. Can You Correct Years Of Bad Posture?

    Yes, many long-term posture habits can improve through regular strength training, mobility work, better workstation setup, and frequent movement breaks. Structural conditions may require professional assessment, but comfort, control, and muscular endurance can still improve.

    2. What Exercise Is Best For Correcting Posture?

    No single movement fixes every posture pattern. Wall Angels, Cat-Cow, Chin Tucks, Bird Dog, rows, and chest stretches work well together because they improve mobility, upper-back strength, neck alignment, and core stability.

    3. How To Correct Posture In 7 Days?

    Use exercises for better posture at home daily, adjust your screen height, take frequent walking breaks, and practise gentle alignment checks. Seven days can improve awareness and stiffness, but lasting strength and habit changes usually require several weeks.

    4. How To Reverse Slouching Posture?

    Strengthen your upper back, core, and glutes while stretching your chest and moving your spine regularly. Avoid forcing your shoulders backward. Consistent exercise, better screen habits, and frequent position changes create more sustainable improvement.

    Stand Tall And Keep Moving

    Better posture develops through patience, movement, and stronger support muscles. Practising exercises for better posture at home several times each week can loosen stiff areas, improve body control, and make everyday positions feel more comfortable. Keep each movement gentle, progress gradually, and remember that changing positions often is just as important as sitting or standing tall.

  • Bodyweight Back Exercises at Home for Real Strength

    Bodyweight Back Exercises at Home for Real Strength

    Long desk hours once left my shoulders tight and my upper back weak. That pushed me to try bodyweight back exercises at home as a practical way to move better without machines or heavy weights. With a mat, a wall, and careful form, you can train the muscles that support posture, pulling strength, and daily movement.

    Key Takeaways

    • Train your upper back, lats, lower back, and shoulder blades.
    • Move slowly and avoid momentum during every repetition.
    • Use only secure surfaces for pulling exercises.
    • Progress with pauses, repetitions, tempo, or harder angles.
    • Stop if you feel sharp, spreading, or unusual pain.

    Your Back Deserves All Your Attention

    Strong back muscles support everyday movement, balanced posture, and safer lifting.

    Your Posture Needs Backup

    The muscles around your shoulder blades help control your arms and support an upright position. They balance routines dominated by push-ups, pressing, and long sitting.

    Daily Life Uses Pulling Strength

    Opening doors, carrying bags, climbing, and moving furniture involve your back. Back training also teaches your core and hips to support the spine during reaching and lifting.

    Why This Topic Matters

    Bodyweight back exercises at home are quiet heroes in a balanced routine. Mirror muscles may get more attention, but your back keeps your shoulders steady and your movement coordinated.

    Focused exercises can help you feel less folded after sitting and more capable during daily activities.

    Floor And Mat Exercises

    Floor And Mat Exercises

    Begin with controlled movements that train your posterior chain without gym equipment.

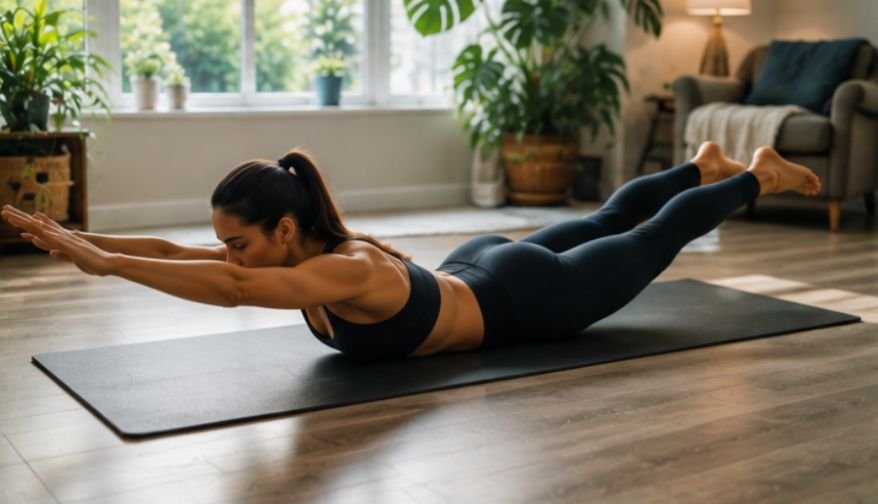
    Superman

    Lie face down with your arms overhead and legs straight. Brace your stomach gently, then lift your chest, arms, and legs a small distance.

    Hold for two seconds and lower slowly. Keep your neck neutral and avoid forcing height. Complete eight to twelve controlled repetitions.

    Reverse Snow Angel

    Lie face down with your arms overhead and palms down. Lift your hands slightly, sweep your arms outward, and continue toward your hips.

    Squeeze your shoulder blades near your sides. Reverse slowly and perform eight to twelve repetitions without overextending your lower back.

    Bird Dog

    Start on your hands and knees. Extend one arm forward and the opposite leg backward while keeping your hips level and spine neutral. Hold briefly, return with control, and complete eight to ten repetitions per side.

    Pulling And Scapular Movements

    These exercises develop pulling mechanics and shoulder-blade control that floor raises cannot fully provide.

    Inverted Row

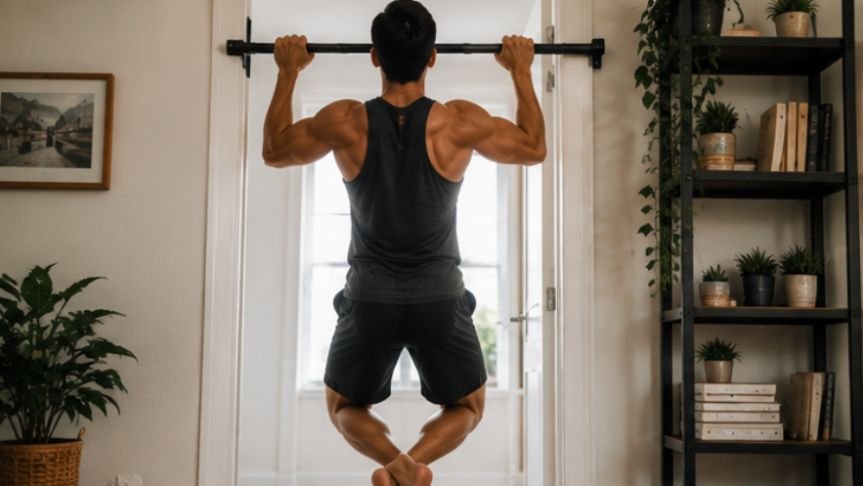
    Lie beneath a professionally secured low bar or a truly stable table. Grip the support, straighten your body, and pull your chest upward by driving your elbows back.

    Lower slowly. Bent knees are easier, while straight legs are harder. Never use weak doors, loose sheets, or uncertain anchors.

    Scapula Push-Up

    Begin in a high plank with straight arms and hands under your shoulders. Let your chest sink slightly as your shoulder blades move together.

    Push the floor away until the shoulder blades spread apart. Keep your hips steady and complete ten to fifteen controlled repetitions.

    Floor Or Wall Slides

    Stand against a wall or lie on the floor with bent knees. Place your arms in a goalpost shape and keep your ribs controlled.

    Slide your arms upward without shrugging or arching. Move only through a comfortable range and complete eight to twelve repetitions.

    How To Do Bodyweight Back Exercises At Home

    How To Do Bodyweight Back Exercises At Home

    A useful routine needs a clear order, good form, and gradual progression.

    Prepare Your Body

    Begin with three to five minutes of gentle movement. Thoracic spine mobility exercises can help prepare your mid-back for smoother rotation, reaching, and shoulder movement.

    Roll your shoulders, reach overhead, rotate your upper back carefully, and practice easy bird dogs. The warm-up should prepare you, not tire you.

    Roll your shoulders, reach overhead, rotate your upper back carefully, and practice easy bird dogs. The warm-up should prepare you, not tire you.

    Choose A Balanced Mix

    Select one lower-back exercise, one upper-back movement, one shoulder-blade drill, and one pulling exercise when secure equipment is available.

    A beginner session could combine supermans, reverse snow angels, scapula push-ups, and bird dogs. Add inverted rows after your setup and technique are dependable.

    Control Every Repetition

    Lift or pull for two seconds, pause briefly, and return for two or three seconds. This slower tempo creates useful tension without momentum.

    End the set when posture changes. Quality beats quantity.

    Build A Weekly Routine

    Consistent training is more useful than one exhausting session. Pairing your exercise routine with best high-fiber foods for everyday meals can also support a balanced daily wellness plan.

    Beginner Plan

    Complete two sets of supermans, reverse snow angels, bird dogs, scapula push-ups, and wall slides. Perform eight to twelve repetitions per exercise.

    Train twice weekly on nonconsecutive days and rest about forty-five seconds between exercises.

    Intermediate Plan

    Perform three sets of reverse snow angels, inverted rows, scapula push-ups, bird dogs, and wall slides. Use eight to fifteen repetitions.

    Make rows harder by straightening your legs or pausing at the top.

    Progress Without Weights

    Your body adapts, so the routine must become gradually more challenging.

    Change One Variable

    Add two repetitions, a longer pause, an extra set, or a slower lowering phase. Change only one factor so you can judge your response.

    Progress when every repetition stays steady. Reduce the challenge when form becomes unstable. Record your repetitions so each future session has a clear, realistic progression target.

    Use Better Leverage

    Longer body positions make many exercises harder. Straight legs challenge inverted rows, while longer arm positions increase the demand of floor raises.

    Increase range only when you can control it. Difficulty should come from muscular tension, not awkward joint positions.

    Common Mistakes To Avoid

    Common Mistakes To Avoid

    Small errors can shift work into your neck, arms, or lower spine.

    Lifting Too High

    Supermans and reverse snow angels need only a small lift. Raising too far often creates unnecessary lower-back pressure.

    Think about reaching long instead of bending backward. Keep your stomach lightly braced and stop when movement loses control.

    Shrugging The Shoulders

    During rows and slides, avoid pulling your shoulders toward your ears. Keep your neck relaxed and guide your shoulder blades down and back. Use fewer repetitions when shrugging begins.

    Ignoring Pain Signals

    Normal muscle effort may feel tiring, but sharp pain, numbness, tingling, or spreading discomfort is different.

    Stop and consult a qualified healthcare professional when symptoms persist, worsen, or interfere with daily activity.

    Frequently Asked Questions

    1. How To Work Out Your Back With Bodyweight?

    Use bodyweight back exercises at home that combine supermans, reverse snow angels, bird dogs, scapula push-ups, wall slides, and secure inverted rows. Together, they train spinal support, shoulder control, and pulling strength.

    2. What Are The Big 3 Exercises For Back?

    For home training, inverted rows, bird dogs, and reverse snow angels form a useful trio. They cover horizontal pulling, spinal stability, and upper-back shoulder-blade control.

    3. How Do I Work Out My Back Without Weights?

    Use slow floor exercises, wall slides, scapular movements, and secure rows. Increase difficulty with longer pauses, controlled tempos, additional repetitions, or harder leverage.

    4. Can You Build Back Muscle Without Weights?

    Yes, especially as a beginner. Muscles respond to tension and progressive overload. Harder angles, rows, pauses, and challenging sets can support growth without traditional weights.

    Strong Back, Better Adventures

    Bodyweight back exercises at home can make your routine balanced, practical, and easier to maintain. Begin with supermans, reverse snow angels, and bird dogs, then add scapular drills and safe inverted rows as your control improves. Train consistently, progress gradually, and respect pain signals. A stronger back supports better posture, smoother movement, and more confidence in daily life.

  • Recovery Without Burnout Can Change the Way You Recharge

    Recovery Without Burnout Can Change the Way You Recharge

    For a long time, I thought recovery meant taking a vacation or sleeping in on the weekend after pushing myself too hard. It felt like something I had to earn after weeks of nonstop work. The problem was that by the time I finally slowed down, I was already exhausted, and a day or two of rest never seemed to fix it.

    Over time, I noticed something different. The people who stayed energized weren’t necessarily working less. They were recovering more often. They stepped away from their desks, protected their evenings, and didn’t feel guilty about slowing down for a few minutes. That changed how I looked at recovery, and it’s one of the biggest reasons people are rethinking their routines today.

    Why Recovery Should Happen Before You Feel Exhausted

    Why Recovery Should Happen Before You Feel Exhausted

    Burnout rarely appears overnight. It builds quietly through skipped breaks, poor sleep, constant notifications, and the feeling that there’s always one more thing to finish. By the time your body starts sending clear signals, you’ve often been running on empty for weeks.

    That’s why recovery without burnout has become a healthier approach. Instead of waiting until you’re physically and mentally drained, you create small moments throughout the day that help your mind and body reset. Recovery becomes part of your routine rather than an emergency solution.

    Recovery Is More Than Just Rest

    Many people use the words “rest” and “recovery” interchangeably, but they aren’t exactly the same.

    Rest is taking a break from activity. Recovery is helping your body and mind return to a balanced state, so you’re ready for what’s next. You can spend an entire afternoon on the couch and still feel mentally exhausted if your brain never disconnects from work.

    Real recovery supports your nervous system, improves mental clarity, and helps you maintain steady energy instead of constantly chasing it.

    Small Breaks Make a Bigger Difference Than You Think

    Small Breaks Make a Bigger Difference Than You Think

    One of the easiest habits to build is taking short recovery breaks before stress becomes overwhelming.

    You don’t need an hour away from work. A five-minute walk, gentle stretching, slow breathing, or stepping outside for fresh air can interrupt the cycle of constant mental effort. These moments allow your attention to recover instead of becoming increasingly scattered throughout the day.

    Many people notice they return to their tasks with better focus after a short pause than after forcing themselves to work through fatigue.

    Stop Treating Recovery Like a Reward

    One of the biggest reasons people struggle with burnout is believing they have to finish everything before they deserve to rest.

    That mindset creates an endless cycle because the work never truly ends. Emails keep arriving, deadlines change, and new responsibilities appear. Waiting until everything is complete usually means recovery never happens.

    Giving yourself permission to pause isn’t laziness. It’s one of the healthiest ways to protect your long-term energy and maintain sustainable productivity.

    Sleep Is Still Your Strongest Recovery Tool

    Sleep Is Still Your Strongest Recovery Tool

    No recovery routine works well without quality sleep.

    While sleeping, your body repairs tissue, supports memory, balances hormones, and prepares your brain for another day. Missing even small amounts of quality sleep over time can reduce concentration, increase stress, and make everyday tasks feel more difficult.

    If you’re already working on optimizing your sleep schedule, you’ll probably notice that other recovery habits become easier to maintain because your body starts each day from a better place.

    Instead of focusing only on sleep duration, pay attention to consistency. Going to bed and waking up at similar times often matters just as much.

    Protect Your Energy, Not Just Your Time

    Time management has always been popular, but energy management deserves just as much attention.

    Some activities leave you feeling motivated, while others drain you even if they only take a few minutes. Learning to recognize those patterns makes it easier to protect your mental energy.

    Simple habits can make a noticeable difference:

    • Say no to commitments that don’t align with your priorities.
    • Reduce unnecessary screen time during the evening.
    • Schedule demanding work when your energy is naturally highest.
    • Make room for hobbies and conversations that help you feel recharged.

    These choices don’t eliminate stress, but they stop it from building without limits.

    Recovery Looks Different for Everyone

    Recovery Looks Different for Everyone

    There isn’t one perfect recovery routine because everyone’s life is different.

    Someone with a physically demanding job may benefit from gentle mobility exercises and extra sleep. A person working at a computer all day might recover better by spending time outdoors or moving more frequently. Parents, students, athletes, and creators all experience different kinds of fatigue.

    The goal isn’t copying someone else’s routine. It’s finding habits that leave you feeling calmer, clearer, and ready for tomorrow instead of simply making it through today.

    Consistency Beats Occasional Escape

    Many people believe a long vacation will completely erase months of stress. While time away certainly helps, lasting recovery usually comes from the habits you repeat every day.

    Short walks, healthy boundaries, quality sleep, meaningful conversations, and regular moments of quiet may seem small on their own. Together, they create a lifestyle that makes burnout far less likely.

    Recovery without burnout isn’t about avoiding hard work. It’s about making sure your body and mind have enough opportunities to recover before exhaustion becomes the only reason you slow down.

    FAQs: Recovery Without Burnout Can Change the Way You Recharge

    1. What does recovery without burnout mean?
    It means building recovery into everyday life instead of waiting until you’re emotionally or physically exhausted. Small, consistent habits help maintain energy before burnout develops.

    2. Can short breaks really improve recovery?
    Yes. Brief walks, stretching, or mindful breathing reduce mental fatigue and improve focus, making it easier to stay productive without feeling constantly drained.

    3. Is sleep the most important recovery habit?
    Sleep is one of the most effective recovery tools because it supports brain function, physical repair, and emotional balance. Consistent sleep often improves the benefits of other healthy habits.

    4. How can I make recovery part of my routine?
    Start with simple habits like protecting your evenings, limiting unnecessary commitments, taking regular breaks, and creating time for activities that genuinely help you recharge.

    The Best Recovery Habits Are the Ones You Keep

    The healthiest routines rarely look dramatic. They don’t require expensive retreats or perfectly planned schedules. Instead, they’re built through small decisions that protect your energy before stress takes over. Choosing to pause, sleep well, move your body, and set healthier boundaries may not feel impressive in the moment, but those habits quietly shape how you feel week after week.

    Recovery isn’t something you earn after burning out. It’s something you practice so burnout doesn’t become your normal.

  • Easy No-Cook Lunches With Protein and Fiber for Busy Days

    Easy No-Cook Lunches With Protein and Fiber for Busy Days

    I used to treat a handful of crackers and a cheese stick as lunch when my schedule became hectic. By midafternoon, I was distracted, hungry and searching for something sweet. Building easy no-cook lunches with protein and fiber changed that pattern without adding another cooking session to my week.

    My best lunches now take five to ten minutes. They combine a ready-to-eat protein, a fiber-rich food, crisp produce and a flavorful finishing ingredient. The result feels like a real meal rather than a random collection of snacks.

    Why Protein and Fiber Make Lunch More Satisfying

    Protein supports muscle maintenance and many essential body functions. Fiber adds volume, supports digestive health and appears in foods such as beans, vegetables, fruit and whole grains.

    Current U.S. dietary guidance encourages nutrient-dense protein foods, vegetables, fruits and fiber-rich whole grains. It also recommends choosing whole or minimally processed foods more often.

    Protein and fiber do not guarantee that every person will remain full for the same period. Appetite also depends on sleep, activity, meal size and individual needs. However, research suggests that protein-rich meals can increase feelings of fullness. Studies of beans and other pulses have also found favorable effects on short-term satiety.

    I use a practical target rather than chasing perfect numbers. Most of my lunches contain about 25 to 35 grams of protein and at least two meaningful fiber sources. That may include beans plus vegetables or whole-grain bread plus fruit.

    My Four-Part No-Cook Lunch Formula

    My Four-Part No-Cook Lunch Formula

    The easiest way to create easy no-cook lunches with protein and fiber is to stop thinking in strict recipes. I build each meal with four parts: protein, fiber, freshness and flavor.

    Choose a Convenient Protein

    Start with one protein that requires no preparation beyond opening or slicing. Useful options include canned tuna, canned salmon, rotisserie chicken, deli turkey, cottage cheese, Greek yogurt, mozzarella, tofu or ready-to-eat lentils.

    Read labels when buying flavored yogurt, deli meat and canned seafood. Sodium, added sugar and serving sizes vary widely between products.

    Add a High-Fiber Base

    Beans are my favorite shortcut because they provide both protein and fiber. Black beans, chickpeas, cannellini beans and lentils work in bowls, wraps and salads.

    Other practical choices include whole-grain bread, high-fiber tortillas, seeded crackers, pears, berries and vegetables. A meal does not need an enormous amount of fiber to count. It simply needs more substance than white bread or chips alone.

    Include Freshness and Crunch

    Texture determines whether I enjoy a no-cook meal. I add at least one crisp ingredient, such as cucumber, bell pepper, shredded carrots, celery or cabbage.

    This is my tested “two-texture rule”: combine one creamy ingredient with one crunchy ingredient. Cottage cheese with peppers works. Hummus with carrots works. Greek yogurt dressing with celery works. The contrast makes simple ingredients feel more complete.

    Finish With a Strong Flavor

    A bland lunch rarely becomes a repeat lunch. Salsa, pesto, mustard, lemon juice, balsamic glaze, hot sauce, herbs or seasoning blends can transform basic staples.

    Use concentrated ingredients carefully. Feta, olives, deli meats and bottled sauces can add considerable sodium when combined in one meal.

    Seven Easy No-Cook Lunch Ideas

    Seven Easy No-Cook Lunch Ideas

    These easy no-cook lunches with protein and fiber can be adjusted around allergies, dietary preferences and whatever is already in the refrigerator.

    Tex-Mex Cottage Cheese and Black Bean Bowl

    Spoon cottage cheese into a bowl and top it with rinsed black beans, chopped bell pepper, tomatoes and salsa. Add taco seasoning, cilantro or pumpkin seeds.

    The cottage cheese creates a high-protein base. Beans and vegetables add fiber and texture. Use plain Greek yogurt instead of cottage cheese when you prefer a smoother bowl.

    Creamy Chickpea Salad Wrap

    Mash chickpeas lightly with Greek yogurt, mustard and lemon juice. Fold in diced celery, walnuts and halved grapes. Roll the mixture inside a whole-grain or high-fiber tortilla.

    I leave some chickpeas whole because a completely smooth filling can become pasty. The celery and walnuts make this lunch much more satisfying.

    Tuna, White Bean and Cucumber Bowl

    Combine drained tuna with rinsed cannellini beans, chopped cucumber, parsley and cherry tomatoes. Dress it with olive oil, lemon juice and black pepper.

    This is one of my most reliable easy no-cook lunches with protein and fiber because both main ingredients are shelf-stable. I can assemble it even when the refrigerator looks nearly empty.

    Turkey Hummus Crunch Roll-Ups

    Spread hummus over sliced turkey breast. Add baby spinach, shredded carrots and thin cucumber strips. Roll each slice tightly and serve it with fruit or whole-grain crackers.

    For a larger lunch, place the same ingredients in a high-fiber tortilla. Check the deli-meat label when you are watching sodium intake.

    Caprese Chickpea Lunch Box

    Combine chickpeas, mozzarella pearls, cherry tomatoes and basil. Add balsamic vinegar or a small amount of balsamic glaze. Pack seeded crackers or a pear on the side.

    This lunch travels well when the dressing stays in a separate container. Add it just before eating to protect the texture.

    Greek Yogurt Chicken Salad Sandwich

    Mix chopped rotisserie chicken with plain Greek yogurt, Dijon mustard, celery and grapes. Spoon it onto whole-grain bread and add lettuce.

    Remove chicken skin before mixing when you want a lighter filling. Store the bread separately if the sandwich will sit for several hours.

    Lentil Feta Mediterranean Bowl

    Combine ready-to-eat lentils with cucumber, tomatoes, spinach, feta and olives. Add lemon juice, oregano and a drizzle of olive oil.

    Lentils make easy no-cook lunches with protein and fiber especially convenient because they require little seasoning and pair well with many vegetables.

    How I Keep No-Cook Lunches Fresh

    How I Keep No-Cook Lunches Fresh

    The difference between a crisp lunch and a soggy one usually comes down to storage. I keep wet ingredients away from bread, wraps and leafy greens until lunchtime.

    I also drain canned foods well. Excess liquid from tuna, beans or mozzarella can dilute dressing and soften vegetables. After rinsing beans, I let them sit in a strainer while I prepare everything else.

    For food safety, refrigerate perishable ingredients promptly and keep packed lunches cold with an insulated bag and frozen ice pack. Do not rely on appearance or smell to determine whether food has remained safe.

    I prepare components rather than fully assembled lunches. Washed vegetables, drained beans and portioned proteins remain more versatile. This method also reduces the boredom that often comes with eating the same meal several days in a row.

    No-Cook Grocery Staples Worth Buying

    A useful grocery list does not need dozens of specialty items. I keep two proteins, two legumes, several crisp vegetables, one whole-grain option and two sauces available each week.

    My regular proteins include cottage cheese, Greek yogurt, tuna, salmon, turkey and rotisserie chicken. Fiber-rich staples include black beans, chickpeas, lentils, whole-grain bread and high-fiber wraps.

    For produce, I choose vegetables that remain crisp for several days. Cucumbers, bell peppers, carrots, cabbage and cherry tomatoes usually perform better than delicate prepared salads.

    A Healthy grocery list for one person on a budget can make this strategy more affordable. Choose ingredients that work across several meals instead of buying separate products for every recipe.

    Before checking out, consider whether each item serves at least two purposes. Hummus can become a sandwich spread, bowl topping or dip. Chickpeas can fill a wrap, salad or snack box. This simple rule helps control waste.

    Frequently Asked Questions

    1. What are the best high-protein lunches that require no cooking?

    Cottage cheese bowls, tuna and bean salads, turkey hummus wraps, Greek yogurt chicken salad and lentil feta bowls are dependable choices.

    2. How can I add more fiber to a cold lunch?

    Add beans, lentils, whole-grain bread, high-fiber wraps, vegetables, berries, pears, nuts or seeds.

    3. Can easy no-cook lunches with protein and fiber support weight management?

    They may improve fullness and meal quality, but weight management still depends on total intake, activity, sleep and individual health needs.

    4. How long can a no-cook lunch stay unrefrigerated?

    Perishable lunches should remain chilled. Use an insulated bag with ice packs and follow current USDA food-safety guidance.

    Your Lunch Break Deserves Better

    I no longer accept a sad desk lunch just because I do not have time to cook. My four-part formula lets me create easy no-cook lunches with protein and fiber from whatever I already have.

    Start with one meal rather than preparing an entire week. Pick a protein, add beans or whole grains, include something crisp and finish with a bold sauce. Your five-minute lunch might become the most reliable meal of your day.

  • Thoracic Spine Mobility Exercises for a Freer Upper Back

    Thoracic Spine Mobility Exercises for a Freer Upper Back

    Long desk hours can leave your mid-back stiff and reluctant to move. A short routine of thoracic spine mobility exercises can restore smoother rotation, easier overhead reach, and better control. The goal is not dramatic bending. It is movement that supports daily life and training.

    Meet Your Thoracic Spine

    Your thoracic spine is the middle section of your back, running from the base of your neck to the bottom of your rib cage. Its twelve vertebrae support turning, reaching, bending, lifting, and breathing.

    This region contributes rotation and extension. When it becomes stiff, the neck, shoulders, or lower back may compensate. That can affect overhead lifting, driving, desk work, and sports involving twisting.

    Mobility Is More Than Stretching

    Flexibility describes how far tissues can lengthen. Mobility describes how well you control movement through an available range. A passive stretch may help you reach a position, but mobility work helps you use it.

    Why Your Mid-Back Needs Attention

    Your upper back is the quiet teammate doing more work than it gets credit for. Thoracic spine mobility exercises help it rotate, extend, and support your shoulders without letting your lower back steal the whole show. Better movement can make reaching, lifting, sitting, and turning feel easier.

    Stiffness often develops from spending too long in one position. Sitting, driving, laptop work, and repetitive workouts reduce movement variety. The answer is not having perfect posture. It is changing positions and giving your spine regular movement options.

    Check Your Movement First

    These checks reveal whether rotation or extension feels limited, but they do not provide a diagnosis.

    Try Seated Rotation

    Sit tall on a chair with both feet flat and your knees together. Cross your arms over your chest, keep your hips forward, and slowly turn your chest to one side. Repeat on the other side.

    Notice whether one direction feels tighter or makes your hips shift. Retest after the routine. Smoother movement matters more than forcing a larger angle.

    Test Overhead Reach

    Stand near a wall with your ribs gently lowered. Raise both arms overhead without arching your lower back or lifting your shoulders.

    Difficulty reaching upward may involve the thoracic spine, shoulders, chest, or lats. It does not prove one area is responsible, but it provides a useful baseline.

    Extension Exercises

    Extension drills help your upper back move backward with control. They are especially useful after long periods of leaning forward.

    Foam Roller Extension

    Foam Roller Extension

    Place a foam roller horizontally on the floor and lie back so it rests under your mid-back. Support your head, keep your hips down, and gently arch over the roller.

    Return to neutral and repeat five to eight times. Shift the roller slightly to reach another segment, but keep it away from your neck and lower back.

    Child’s Pose With Reach

    Kneel, sit your hips toward your heels, and reach both arms forward. Press your hands into the floor while allowing your chest to lower gently.

    Take three to five slow breaths. Keep your abdomen lightly engaged. For a side stretch, walk both hands in one direction and breathe into the opposite rib cage.

    Rotation Exercises

    Rotation drills improve your ability to turn through the rib-cage area without twisting excessively through your hips or lumbar spine.

    Open Book

    Lie on your side with your knees bent to ninety degrees and your arms stacked forward. Slowly rotate your top arm and upper body backward while keeping your knees together.

    Follow your hand with your eyes and return slowly. Complete six repetitions per side. You should feel a gentle opening through your chest and mid-back, not lower-back strain.

    Thread The Needle

    Start on your hands and knees. Slide one arm underneath your body until your shoulder moves toward the floor, then return and rotate that arm upward.

    Complete six repetitions per side. Keep your hips still, exhale as you rotate, and stop before the movement becomes forced.

    How To Use Thoracic Spine Mobility Exercises

    How To Use Thoracic Spine Mobility Exercises

    Start with eight slow Cat-Cow repetitions to warm your spine, then perform six Thread the Needle repetitions per side. Continue with five foam roller extensions and six Open Book rotations per side.

    Pairing this sequence with a morning stretching routine for flexibility can help reduce overnight stiffness, improve whole-body mobility, and make regular movement easier to maintain.

    Finish with three breaths in Child’s Pose with Reach and eight Wall Angels. Move slowly enough to notice compensation, then repeat your seated rotation or overhead check.

    Practise this sequence three to five times weekly. On busy days, complete one extension drill and one rotation drill for five minutes. Consistency matters more than perfection.

    Fix Common Form Errors

    Good technique keeps each movement focused, controlled, and useful.

    Control Your Lower Back

    Many people create false thoracic extension by arching the lumbar spine and flaring the ribs. Brace your abdomen and reduce the range if your lower back takes over.

    During rotation, stop your pelvis from following your chest. A smaller movement from the correct area is better than a larger compensated movement.

    Breathe And Slow Down

    Holding your breath creates tension. Use a slow exhale as you rotate or move into a comfortable stretch, and keep your jaw and shoulders relaxed.

    Gentle mobility work can also become part of your daily self-care ideas that cost nothing, especially when you need a simple way to reduce stiffness, reset your focus, and feel better without equipment or a paid class.

    Avoid bouncing, pulling your neck, or chasing extreme range. Smooth repetitions improve control and make progress easier to notice.

    Build Strength Around New Range

    Build Strength Around New Range

    Mobility becomes useful when your muscles can control it. Add rows, face pulls, reverse fly variations, carries, and light overhead work to support the upper back and shoulders.

    Choose manageable loads and maintain steady breathing. Strength does not replace mobility, but it helps you use new range during exercise, sports, and daily tasks.

    Know When To Stop

    Mild muscular tension may be acceptable, but sharp pain, numbness, tingling, dizziness, chest pain, or worsening weakness are reasons to stop. Seek professional guidance when symptoms follow an injury.

    A physical therapist or qualified clinician can determine whether stiffness involves the thoracic spine, shoulder, neck, ribs, or another area. Mobility drills should support care, not replace assessment.

    Frequently Asked Questions

    1. How To Increase Mobility In Thoracic Spine?

    Use thoracic spine mobility exercises combining controlled extension, rotation, side bending, breathing, and upper-back strengthening. Practise regularly and retest your movement instead of forcing an aggressive stretch.

    2. What Are The Symptoms Of A Weak Thoracic Spine?

    Possible signs include poor upper-back endurance, difficulty controlling overhead movement, frequent lower-back compensation, and trouble maintaining stable posture during lifting or prolonged sitting.

    3. How To Loosen Up A Stiff Thoracic Spine?

    Start with Cat-Cow, Open Book rotations, foam roller extensions, and Child’s Pose with Reach. Move slowly, breathe normally, and stop before discomfort becomes sharp.

    4. How To Self Mobilize Thoracic Spine?

    Use a foam roller, chair-backed extension, or controlled floor rotation. Keep pressure away from your neck, avoid forceful cracking, and focus on gentle, repeatable movement.

    Let Your Upper Back Join The Party

    A stiff mid-back does not need punishing stretches. The best thoracic spine mobility exercises train extension, rotation, breathing, and control. Start with a self-check, choose drills matching your restriction, and retest afterward. Better movement comes from patient practice, not one dramatic session.