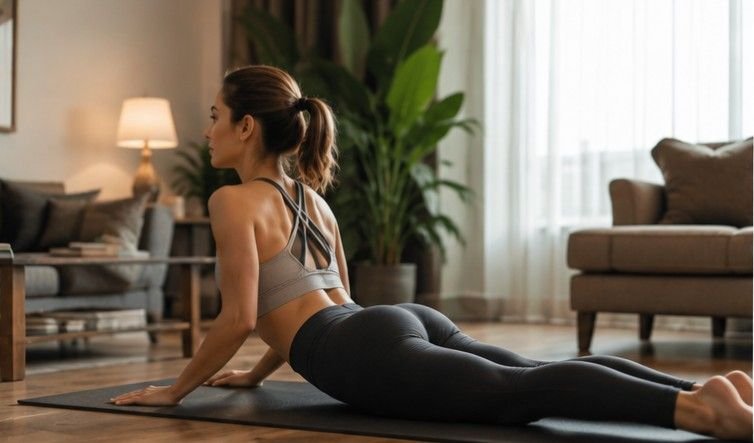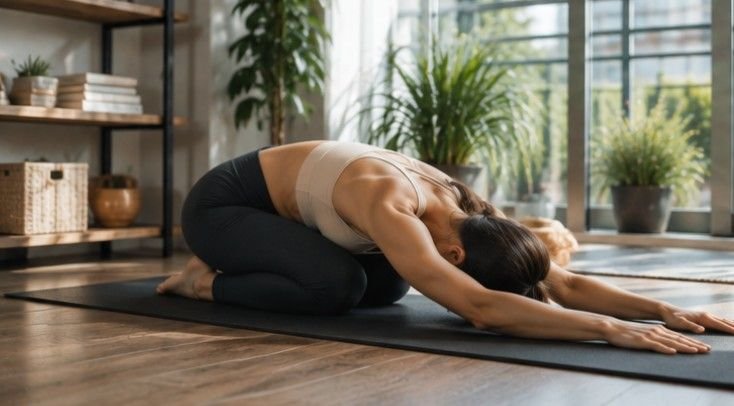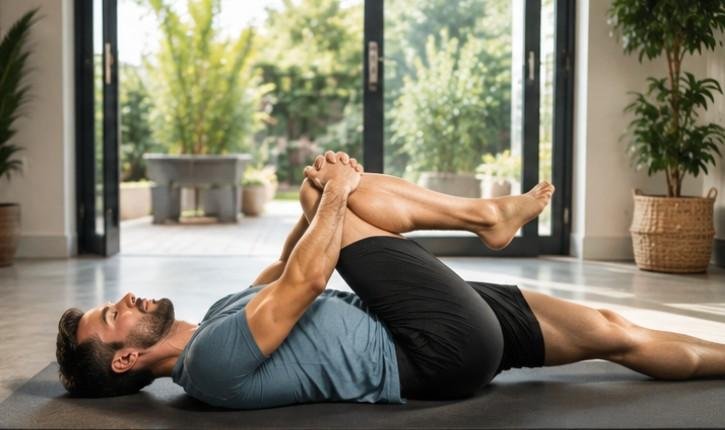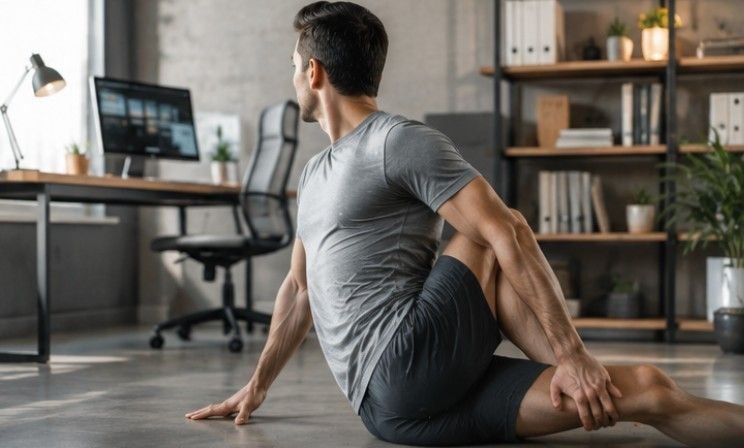
Category: Fitness and Movement

  • Seven-day Healthy Eating Meal Plan for Beginners

    Seven-day Healthy Eating Meal Plan for Beginners

    I learned very quickly that healthy eating became much easier once I stopped chasing perfect diets and focused on simple, repeatable meals. This Seven-day healthy eating meal plan for beginners gave me structure without making me count every calorie or spend hours in the kitchen. 

    Instead of complicated recipes, I relied on balanced meals that supplied protein, fiber, healthy fats, and slow-digesting carbohydrates throughout the day.

    The biggest surprise was that consistency mattered far more than variety. After following this routine for a week, grocery shopping became easier, meal decisions disappeared, and my energy stayed more stable between meals.

    Why This Seven-Day Plan Actually Works

    Why This Seven-Day Plan Actually Works

    Many beginner meal plans focus only on calories. This one focuses on nutrition quality.

    Each day combines lean protein, complex carbohydrates, healthy fats, and fiber-rich vegetables to support steady energy while helping you stay full longer. 

    According to the Dietary Guidelines for Americans and Harvard’s Healthy Eating Plate, balanced meals improve diet quality and make healthy eating easier to sustain over time.

    The Nutrition Balance Behind Every Meal

    Every meal contains several important components.

    Complex carbohydrates provide lasting energy.

    Protein supports muscles and increases fullness.

    Healthy fats help absorb fat-soluble vitamins.

    Fiber supports digestion while promoting a healthier gut microbiome.

    This combination naturally reduces unnecessary snacking during the day.

    Simple Prep Instead of Complicated Recipes

    One lesson I discovered was that beginner meal plans fail when cooking becomes exhausting.

    Rather than preparing seven completely different recipes, I batch-cook grains, lentils, beans, chopped vegetables, tofu, and paneer. Mixing them differently throughout the week creates variety without doubling kitchen time.

    Seven-day Healthy Eating Meal Plan for Beginners

    Seven-day Healthy Eating Meal Plan for Beginners

    Day 1

    Breakfast begins with chia seed pudding made using almond milk and berries.

    Lunch includes hearty lentil soup alongside a fresh cucumber salad.

    Dinner features grilled paneer with sautéed green beans.

    Snack on a handful of raw almonds.

    Day 2

    Start with rolled oats cooked in creamy coconut milk.

    Lunch combines chickpeas, avocado, cucumber, and fresh lemon.

    Dinner includes stir-fried tofu with broccoli and mushrooms.

    Roasted makhana provides a crunchy afternoon snack.

    Day 3

    Breakfast features vegetable poha with roasted peanuts and curry leaves.

    Lunch is a quinoa bowl mixed with black beans and sweet corn.

    Dinner includes a light vegetable stew served with a simple salad.

    Finish the day with plain Greek yogurt and walnuts.

    Day 4

    Enjoy savory moong dal cheela for breakfast.

    Lunch pairs brown rice with rich rajma curry.

    Dinner consists of baked tofu served beside roasted sweet potatoes.

    An apple makes an easy snack.

    Day 5

    Blend spinach, banana, and chia seeds into a quick smoothie.

    Lunch includes a refreshing quinoa salad with cucumbers and tomatoes.

    Dinner features paneer tikka served over mixed greens.

    Roasted chickpeas satisfy afternoon cravings.

    Day 6

    Sabudana khichdi with roasted peanuts starts the day.

    Lunch combines comforting moong dal khichdi with low-fat curd.

    Dinner includes stir-fried mixed vegetables with mashed avocado.

    A glass of coconut water provides natural hydration.

    Day 7

    Prepare warm amaranth porridge topped with pumpkin seeds.

    Lunch includes chickpea curry with brown rice.

    Dinner finishes the week with vegetable soup and grilled tofu skewers.

    Enjoy sliced pear or guava as a refreshing snack.

    How to Prepare an Entire Week in Under Two Hours

    How to Prepare an Entire Week in Under Two Hours

    The biggest improvement I made was preparing ingredients instead of complete meals.

    Cooking grains, legumes, and proteins once reduced my daily cooking time to about fifteen minutes.

    Weekend Meal Prep Checklist

    Wash and chop vegetables first.

    Cook quinoa, brown rice, and lentils together.

    Bake tofu and grill paneer in separate batches.

    Prepare overnight chia pudding jars.

    Portion healthy snacks into reusable containers.

    Store everything in labeled containers for easy access.

    Storage Tips That Keep Food Fresh

    Most cooked grains stay fresh for four days when refrigerated.

    Leafy greens remain crisp longer if wrapped inside paper towels before refrigeration.

    Soups freeze exceptionally well for busy weekdays.

    Fresh fruit should remain uncut until needed.

    If frozen vegetables are part of your routine, learning to make frozen vegetables taste good and healthy helps add variety while keeping meal preparation quick.

    Common Beginner Mistakes That Slow Progress

    Healthy eating often becomes difficult because of habits rather than food choices.

    Skipping Meals

    Missing meals usually leads to larger portions later in the day and inconsistent energy levels.

    Eating consistently supports better appetite regulation.

    Not Eating Enough Fiber

    Many beginners focus only on protein.

    Fiber from vegetables, beans, oats, seeds, and fruit improves digestion while keeping meals satisfying.

    Adults generally benefit from approximately 25 to 38 grams of fiber daily depending on age and sex.

    Ignoring Hydration

    Water supports digestion, nutrient absorption, and normal metabolism.

    I keep a reusable water bottle nearby because waiting until I feel thirsty usually means I’m already behind.

    Unsweetened herbal tea also works well between meals.

    Simple Ways to Customize This Meal Plan

    This schedule works because it remains flexible.

    Swap tofu for beans.

    Replace quinoa with brown rice.

    Choose seasonal vegetables instead of expensive specialty produce.

    Adjust portions based on your activity level.

    If dairy isn’t suitable, substitute paneer and Greek yogurt with fortified plant-based alternatives.

    One practical observation I noticed after repeating this plan several times was that preparing versatile ingredients instead of fixed meals reduced food waste by nearly one-third in my kitchen. Leftover vegetables naturally became soups, salads, or stir-fries rather than ending up in the trash.

    Ready, Set, Eat Without the Stress!

    Healthy eating does not require expensive ingredients, strict rules, or gourmet recipes. I found that repeating simple, balanced meals created habits that lasted far longer than any restrictive diet ever could. Start with one week, learn what fits your lifestyle, and improve one meal at a time. Progress grows through consistency, not perfection.

    Frequently Asked Questions

    1. Is a Seven-day healthy eating meal plan for beginners good for weight loss?

    Yes. It can support healthy weight management when portions match your calorie needs and meals remain balanced.

    2. Can I prepare this meal plan ahead of time?

    Yes. Most grains, legumes, soups, and cooked proteins can be prepared several days in advance.

    3. Can beginners replace ingredients they dislike?

    Absolutely. Choose nutritionally similar foods that fit your preferences and dietary needs.

    4. How much water should I drink while following this plan?

    Aim for regular hydration throughout the day, adjusting intake based on activity level, climate, and individual needs.

  • Low Impact Cardio Workouts at Home for Everyday Fitness

    Low Impact Cardio Workouts at Home for Everyday Fitness

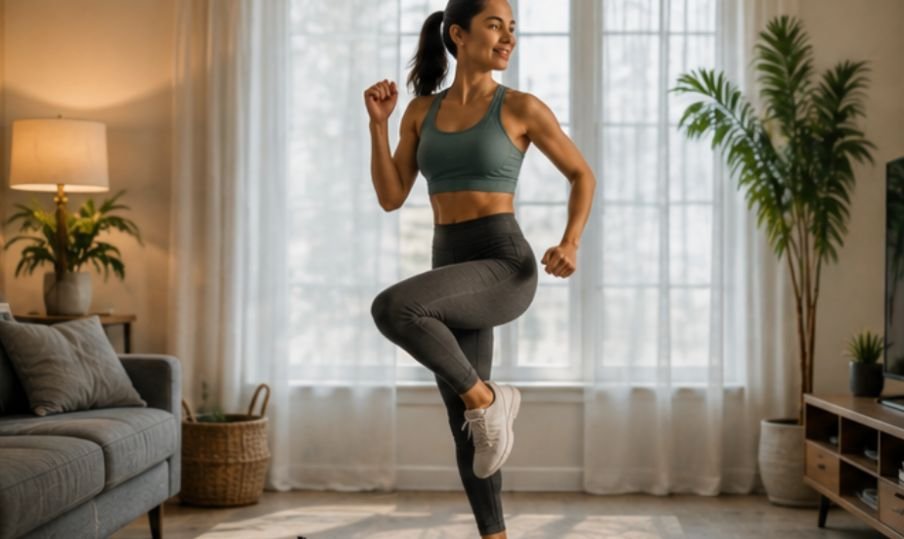
    Finding time to exercise can feel impossible, especially when running or jumping leaves your knees complaining. That is exactly why low impact cardio workoutsat home have become my favorite way to stay active. These simple movements increase your heart rate, improve endurance, and protect your joints, making fitness feel achievable for beginners and experienced exercisers alike.

    Key Takeaways

    • Low impact workouts protect your joints while improving heart health.
    • No equipment is needed for an effective home routine.
    • Short sessions performed consistently deliver excellent results.
    • Small changes in speed can increase workout intensity.
    • Proper form is more important than moving fast.

    Making Low Impact Cardio Effective

    Understanding how these exercises work helps you get better results.

    Your Heart Still Works Hard

    Low impact simply means at least one foot stays in contact with the ground. It does not mean the workout is easy. By using continuous movements and large muscle groups, your heart rate rises naturally while reducing unnecessary stress on your joints.

    Simple exercises like marching, side stepping, and standing knee drives can become surprisingly challenging when performed continuously. Increasing your arm movement and maintaining a steady pace creates an excellent cardiovascular workout without jumping.

    Perfect for Every Fitness Level

    These workouts work well for beginners, older adults, people returning after a break, or anyone recovering from minor joint discomfort. Since every exercise can be adjusted, you stay in control of the intensity instead of forcing your body beyond its limits.

    Even experienced exercisers often include low impact training on recovery days because it supports cardiovascular endurance while allowing muscles and joints to recover from harder workouts.

    Prepare for Success

    A little preparation makes every workout safer and more enjoyable.

    Create a Comfortable Workout Space

    Choose a flat area where you can move freely in every direction. Remove anything that might cause you to trip and wear comfortable athletic shoes with good support if your flooring is hard or slippery.

    Keep a water bottle nearby and make sure the room has enough fresh air. These simple steps help you stay comfortable throughout your session.

    Start with a Proper Warm Up

    Never rush into fast movements. Spend three to five minutes performing gentle arm circles, shoulder rolls, slow marches, heel taps, and side steps to wake up your muscles gradually.

    A proper warm up improves circulation, prepares your joints for movement, and reduces the chance of stiffness during your workout. Those few minutes often make the entire session feel smoother.

    How to Do Low Impact Cardio Workouts at Home

    How to Do Low Impact Cardio Workouts at Home

    Now comes the fun part where movement meets results.

    Begin with Simple Cardio Moves

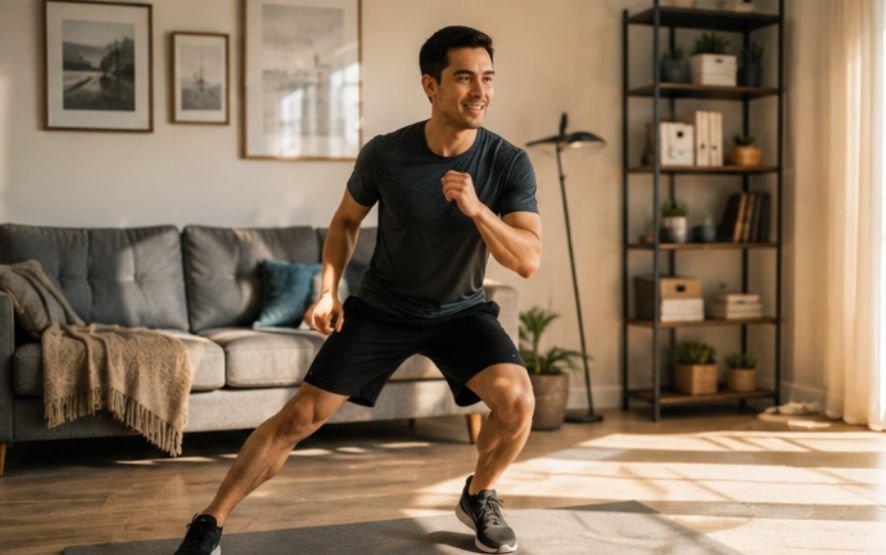
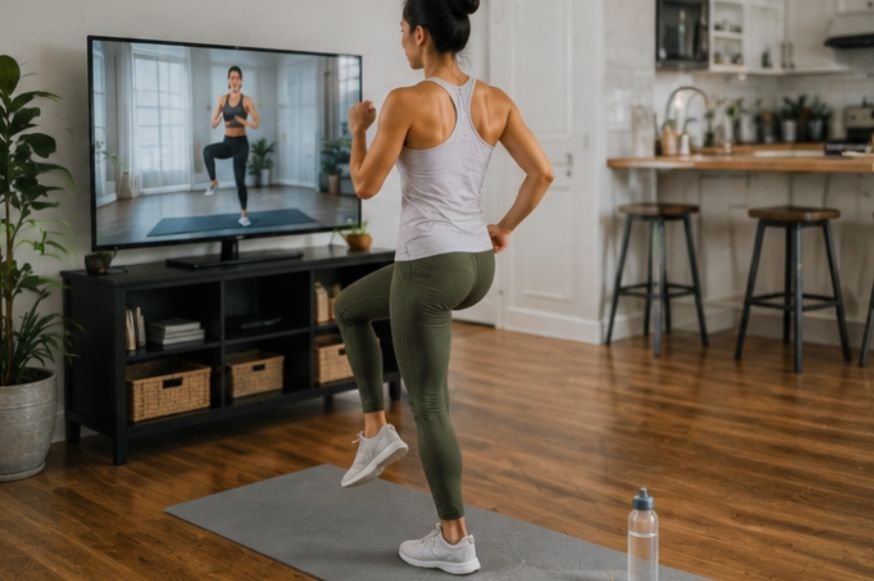
    Start by marching in place while pumping your arms naturally. Lift each knee only to a comfortable height and maintain an upright posture. Continue for thirty to forty five seconds before moving to the next exercise.

    Perform low impact jumping jacks by stepping one foot sideways while raising your arms overhead instead of jumping. Alternate sides continuously to keep your heart rate elevated while protecting your joints.

    Modified speed skaters are another excellent choice. Step side to side while lightly tapping your back foot behind your body instead of leaping. This movement improves coordination while remaining gentle on your knees.

    Add More Dynamic Exercises

    Next, perform squat to front kicks. Complete a comfortable bodyweight squat, stand up, then extend one leg into a gentle front kick before repeating on the opposite side. Keep every movement controlled and avoid rushing.

    Standing bicycle crunches help strengthen your core while maintaining cardiovascular activity. Bring one elbow toward the opposite knee, then switch sides using slow, controlled movements. This exercise improves balance as well as coordination.

    Shadow boxing with light foot movement also keeps your heart working while engaging your upper body. Throw controlled punches while marching softly in place for an effective full body cardio challenge.

    Follow a Smart Workout Structure

    Begin every session with three to five minutes of warming up using light marching and arm circles.

    Perform each exercise continuously for thirty to forty five seconds, followed by ten to fifteen seconds of recovery. This timing keeps your breathing elevated while allowing enough recovery to maintain good form.

    Complete three total circuits to create an effective fifteen to twenty minute workout. Many experienced exercisers appreciate timed intervals because they provide structure while keeping intensity consistent throughout the session.

    Simple Ways to Increase Results

    Simple Ways to Increase Results

    Small adjustments often produce surprisingly big improvements.

    Increase Intensity Without Jumping

    Rather than adding impact, increase your walking speed, pump your arms more actively, or shorten your recovery periods slightly. These changes raise your heart rate while keeping the workout joint friendly, even with hip or knee pain.

    You can also increase your movement range by taking slightly wider steps or lifting your knees a little higher as your fitness improves. Progress gradually instead of making large jumps in difficulty.

    Listen to Your Body

    Feeling warm and breathing harder are completely normal during cardio exercise. Sharp pain, dizziness, or worsening joint discomfort are signals to stop and recover.

    Fitness improves through consistency rather than pushing through pain. Choosing modifications whenever necessary helps build a long lasting exercise habit that supports your health.

    Real Life Tips for Daily Success

    Real Life Tips for Daily Success

    Building healthy habits is easier than chasing perfection. Learning how to make frozen vegetables taste good and healthy can support the same practical approach by making balanced meals easier on busy days.

    Fit Exercise Into Busy Days

    Not every workout has to last an hour. Even fifteen to twenty minutes before breakfast, during lunch, or after work can improve your energy and cardiovascular health.

    Breaking longer workouts into two shorter sessions also works well for many people. Every minute of movement contributes toward your weekly activity goals.

    Mix Cardio with Strength Training

    Low impact cardio works even better when combined with simple strength exercises such as chair squats, wall push ups, glute bridges, and calf raises.

    Adding exercises for better posture at home can also improve core control, shoulder alignment, and body awareness during cardio movements. Strong muscles provide better support for your joints during daily activities.

    Alternating cardio and strength sessions throughout the week creates a balanced fitness routine that improves endurance, mobility, and overall health without overwhelming your body.

    Frequently Asked Questions

    1. What is the most effective low-impact cardio?

    The most effective low impact cardio depends on consistency and effort. Brisk walking, marching in place, step touches, cycling, swimming, and bodyweight home circuits all improve cardiovascular fitness while remaining gentle on your joints.

    2. What is the 3-3-3 rule for cardio workouts?

    The 3-3-3 rule commonly refers to balancing strength training, cardio sessions, and active recovery throughout the week. It encourages variety, supports recovery, and helps maintain a sustainable long term exercise routine.

    3. How to do low-impact cardio at home?

    Perform continuous movements such as marching in place, low impact jumping jacks, modified speed skaters, standing bicycle crunches, and squat to front kicks for timed intervals while maintaining controlled movement and proper posture.

    4. Is 20 minutes of cardio a day enough?

    Yes. Twenty minutes of moderate cardio each day can significantly improve heart health, endurance, and calorie expenditure. Combined with strength training and regular movement, it supports long term fitness goals effectively.

    Keep Your Heart Happy One Step at a Time

    The best low impact cardio workouts at home are the ones you actually enjoy enough to repeat every week. You do not need expensive machines, endless space, or high impact movements to become fitter. Start with simple exercises, move at your own pace, celebrate small improvements, and let consistency do the heavy lifting. Your heart, joints, and future self will all appreciate the effort.

  • Exercises for Better Posture at Home: A Simple Daily Routine

    Exercises for Better Posture at Home: A Simple Daily Routine

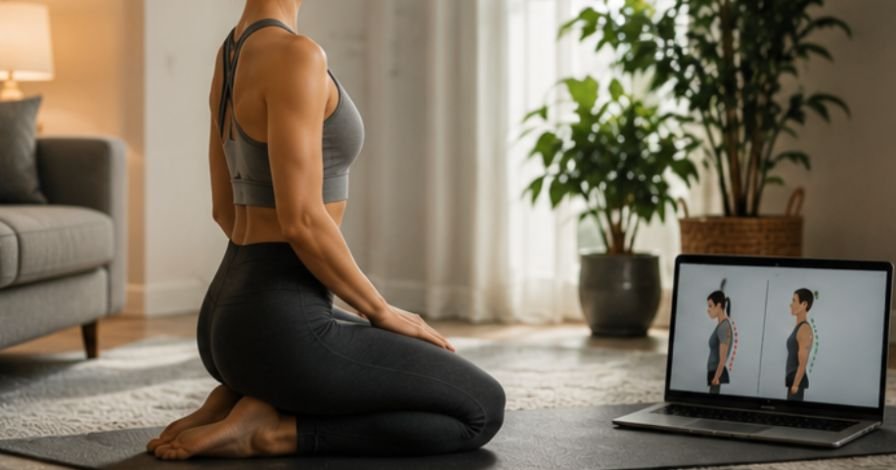
    Long hours at a desk can turn sitting into rounded shoulders, a stiff neck, and an aching back. My posture often slips after screen time, so exercises for better posture at home feel so practical. They need little space and only a few focused minutes.

    Good posture is not rigid. It helps your muscles support comfortable movement without forcing your body into one rigid position.

    Key Takeaways

    • Move slowly and focus on control.
    • Train your back, neck, core, and hips.
    • Stretch tight areas without forcing them.
    • Take movement breaks during long sitting periods.
    • Stop if you feel sharp pain or numbness.

    What Good Posture Does To You?

    These movements can make daily life more comfortable.

    Your Body Hates Being A Desk Ornament

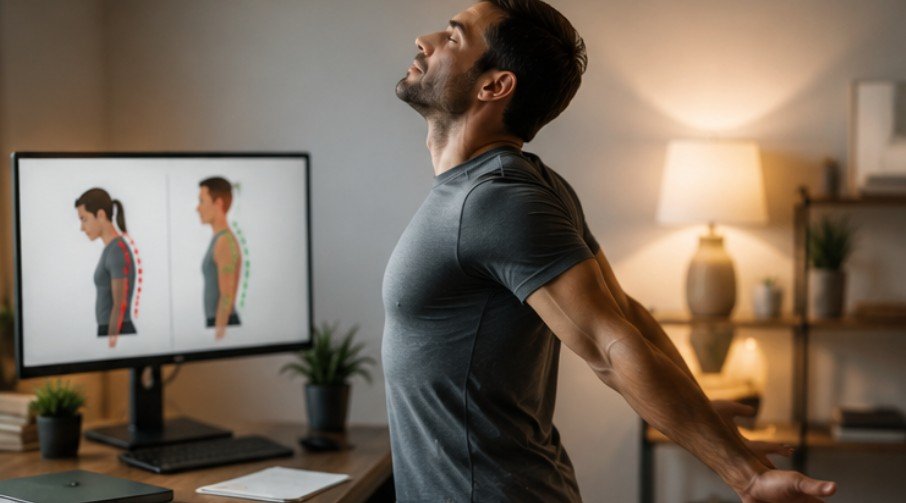
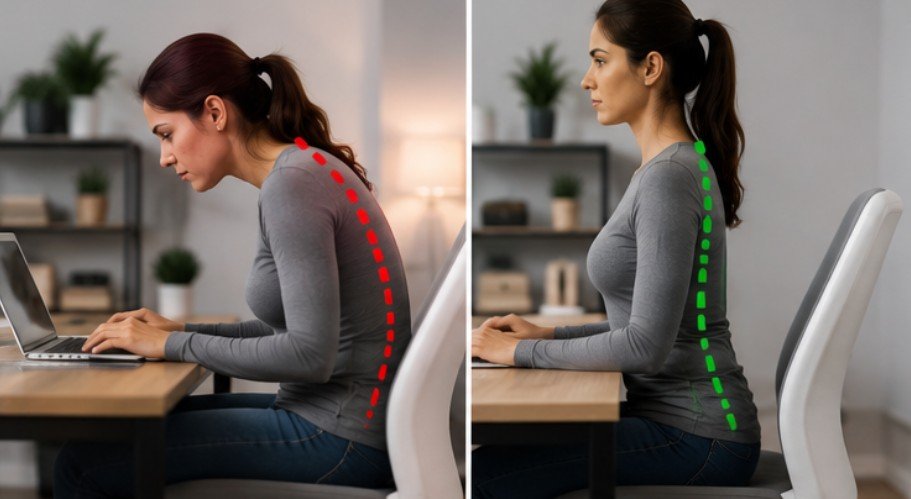
    Exercises for better posture at home are necessary because your body is built to move, not freeze in a chair. Tight chest muscles, weak upper back muscles, and a forward head position can make even simple tasks feel tiring. A short routine wakes up sleepy muscles and gives your spine a much-needed change of scenery.

    Posture Affects Everyday Movement

    Poor alignment can influence how you lift groceries, climb stairs, use your phone, and even breathe. Rounded shoulders may limit comfortable arm movement, while weak core muscles can make your lower back work harder than necessary.

    Better body awareness helps you notice and change slouching habits before they become uncomfortable.

    Upper Body And Back

    Upper Body And Back

    These movements open the chest and support the shoulders.

    Wall Angels

    Stand with your back, head, and hips against a wall. Move your feet slightly forward and bend your elbows to 90 degrees. Keep your ribs relaxed as you slowly slide your arms upward, then bring them back down.

    Continue for one to two minutes without forcing tight shoulders. Wall angels strengthen the mid-back and improve shoulder control after prolonged sitting.

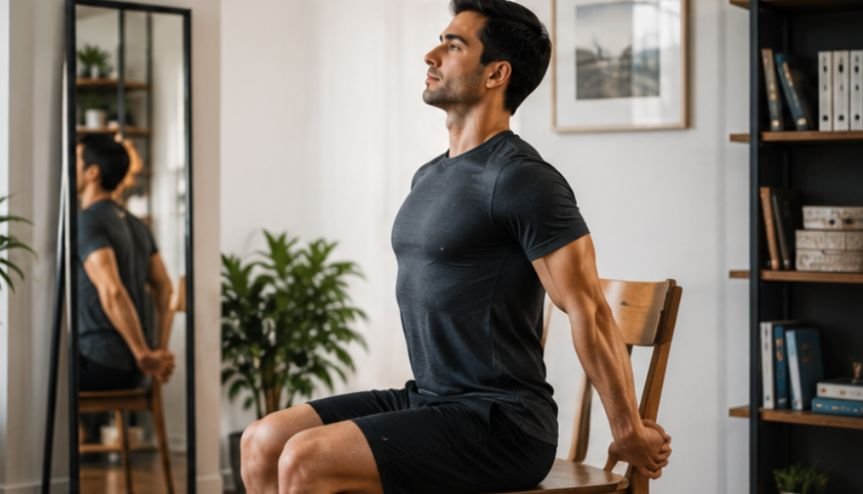
    Chest Opener

    Stand tall and clasp your hands behind your lower back. Gently pull your shoulders down and back while lifting your chest slightly. Keep your neck relaxed and avoid arching your lower back.

    Hold for five slow breaths and repeat five times. This stretches the chest and supports relaxed shoulder positioning. Use a towel if clasping your hands feels uncomfortable.

    Spine And Core

    Spine And Core

    These exercises mobilize the spine and strengthen the core.

    Cat-Cow Stretch

    Begin on your hands and knees with your wrists under your shoulders and knees under your hips. Breathe out as you round your back toward the ceiling and gently lower your head. Then breathe in as you lower your belly and lift your chest.

    Repeat for one minute through a comfortable range. Cat-Cow reduces stiffness and prepares your back for strengthening work.

    Bird Dog

    Stay on your hands and knees. Tighten your abdomen gently, then reach your right arm forward while extending your left leg backward. Keep your hips level and avoid twisting your body.

    Hold for three seconds, return, and switch sides for two minutes. Bird Dog strengthens the core, glutes, shoulders, and back while building spinal control.

    Neck Alignment

    These movements address screen-related forward head posture.

    Chin Tuck

    Sit or stand tall with your eyes looking forward. Pull your chin straight backward as though you are making a double chin. Keep your head level and avoid looking down.

    Hold for five seconds and repeat ten times. The movement should feel gentle, not forceful. Chin tucks activate deep neck muscles and improve awareness of where your head sits over your shoulders.

    Shoulder Reset

    Let your arms hang naturally beside your body. Lift your shoulders toward your ears, roll them backward, and allow them to settle down. Repeat five slow times while breathing normally.

    This reset may ease tension after typing or phone use. Keep the movement relaxed rather than squeezing your shoulder blades forcefully.

    How To Use The Routine

    Use this order for a practical home workout.

    Build A Ten-Minute Session

    Start exercises for better posture at home with one minute of Cat-Cow to loosen your spine. Move to Wall Angels for one minute, followed by five Chest Opener repetitions. Complete ten Chin Tucks before performing Bird Dog for two minutes.

    Finish with Shoulder Resets and a short walk around the room. Rest whenever your form becomes sloppy. A controlled ten-minute routine is more useful than a rushed workout filled with extra repetitions.

    Choose A Realistic Schedule

    Perform the complete routine three to five times each week. On busy days, choose Wall Angels, Chin Tucks, and Cat-Cow for a quick three-minute movement break.

    Consistency matters more than intensity. Build endurance gradually rather than doubling the routine during your first week.

    Fit It Into Daily Life

    Set a reminder to stand every 30 to 60 minutes. Walk briefly, stretch your chest, or complete a few Chin Tucks. These breaks prevent prolonged stillness.

    Keep your screen near eye level and your feet supported. Raise your phone toward your face instead of dropping your head.

    Planning easy no-cook lunches with protein and fiber can also make busy workdays feel more balanced without requiring extra preparation time.

    Common Posture Mistakes

    Common Posture Mistakes

    Avoid these errors for safer, better progress.

    Forcing A Straight Position

    Pulling your shoulders back constantly can create tension in your neck and upper back. Your spine has natural curves, so it should not look completely flat.

    Aim for relaxed alignment that still lets you breathe and move freely.

    Ignoring The Lower Body

    Posture is not controlled by the neck and shoulders alone. Your core, hips, legs, and glutes help support you during standing, walking, and lifting.

    Adding bodyweight back exercises at home can further strengthen the muscles that support your spine and shoulder blades. Add walking, squats, and glute bridges as your fitness improves. Whole-body strength supports more efficient movement.

    Exercising Through Pain

    Mild effort and a gentle stretch are normal. Sharp pain, numbness, tingling, dizziness, or weakness are warning signs.

    Stop if symptoms appear. Seek professional advice if pain persists, follows an injury, interrupts sleep, or worsens with movement.

    Frequently Asked Questions

    1. Can You Correct Years Of Bad Posture?

    Yes, many long-term posture habits can improve through regular strength training, mobility work, better workstation setup, and frequent movement breaks. Structural conditions may require professional assessment, but comfort, control, and muscular endurance can still improve.

    2. What Exercise Is Best For Correcting Posture?

    No single movement fixes every posture pattern. Wall Angels, Cat-Cow, Chin Tucks, Bird Dog, rows, and chest stretches work well together because they improve mobility, upper-back strength, neck alignment, and core stability.

    3. How To Correct Posture In 7 Days?

    Use exercises for better posture at home daily, adjust your screen height, take frequent walking breaks, and practise gentle alignment checks. Seven days can improve awareness and stiffness, but lasting strength and habit changes usually require several weeks.

    4. How To Reverse Slouching Posture?

    Strengthen your upper back, core, and glutes while stretching your chest and moving your spine regularly. Avoid forcing your shoulders backward. Consistent exercise, better screen habits, and frequent position changes create more sustainable improvement.

    Stand Tall And Keep Moving

    Better posture develops through patience, movement, and stronger support muscles. Practising exercises for better posture at home several times each week can loosen stiff areas, improve body control, and make everyday positions feel more comfortable. Keep each movement gentle, progress gradually, and remember that changing positions often is just as important as sitting or standing tall.

  • Bodyweight Back Exercises at Home for Real Strength

    Bodyweight Back Exercises at Home for Real Strength

    Long desk hours once left my shoulders tight and my upper back weak. That pushed me to try bodyweight back exercises at home as a practical way to move better without machines or heavy weights. With a mat, a wall, and careful form, you can train the muscles that support posture, pulling strength, and daily movement.

    Key Takeaways

    • Train your upper back, lats, lower back, and shoulder blades.
    • Move slowly and avoid momentum during every repetition.
    • Use only secure surfaces for pulling exercises.
    • Progress with pauses, repetitions, tempo, or harder angles.
    • Stop if you feel sharp, spreading, or unusual pain.

    Your Back Deserves All Your Attention

    Strong back muscles support everyday movement, balanced posture, and safer lifting.

    Your Posture Needs Backup

    The muscles around your shoulder blades help control your arms and support an upright position. They balance routines dominated by push-ups, pressing, and long sitting.

    Daily Life Uses Pulling Strength

    Opening doors, carrying bags, climbing, and moving furniture involve your back. Back training also teaches your core and hips to support the spine during reaching and lifting.

    Why This Topic Matters

    Bodyweight back exercises at home are quiet heroes in a balanced routine. Mirror muscles may get more attention, but your back keeps your shoulders steady and your movement coordinated.

    Focused exercises can help you feel less folded after sitting and more capable during daily activities.

    Floor And Mat Exercises

    Floor And Mat Exercises

    Begin with controlled movements that train your posterior chain without gym equipment.

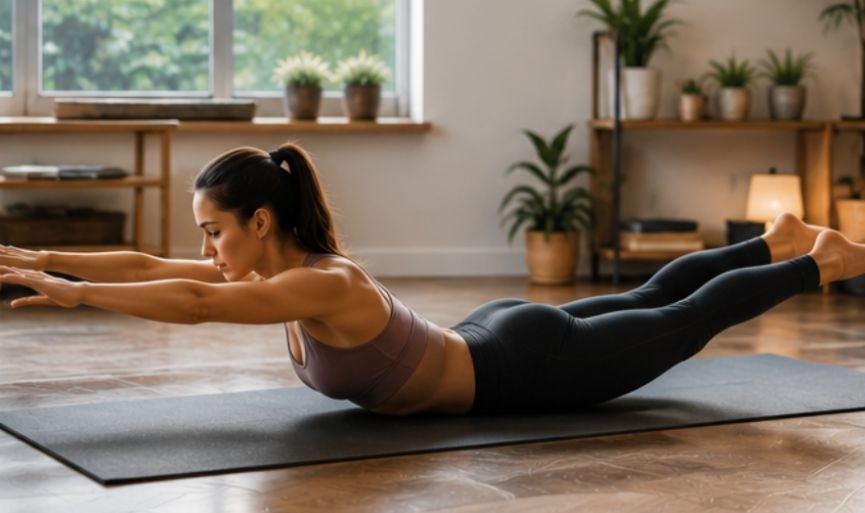
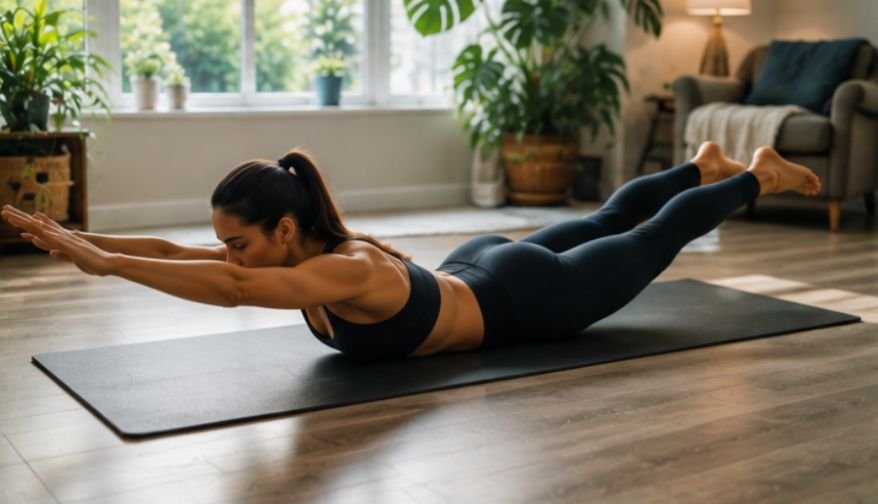
    Superman

    Lie face down with your arms overhead and legs straight. Brace your stomach gently, then lift your chest, arms, and legs a small distance.

    Hold for two seconds and lower slowly. Keep your neck neutral and avoid forcing height. Complete eight to twelve controlled repetitions.

    Reverse Snow Angel

    Lie face down with your arms overhead and palms down. Lift your hands slightly, sweep your arms outward, and continue toward your hips.

    Squeeze your shoulder blades near your sides. Reverse slowly and perform eight to twelve repetitions without overextending your lower back.

    Bird Dog

    Start on your hands and knees. Extend one arm forward and the opposite leg backward while keeping your hips level and spine neutral. Hold briefly, return with control, and complete eight to ten repetitions per side.

    Pulling And Scapular Movements

    These exercises develop pulling mechanics and shoulder-blade control that floor raises cannot fully provide.

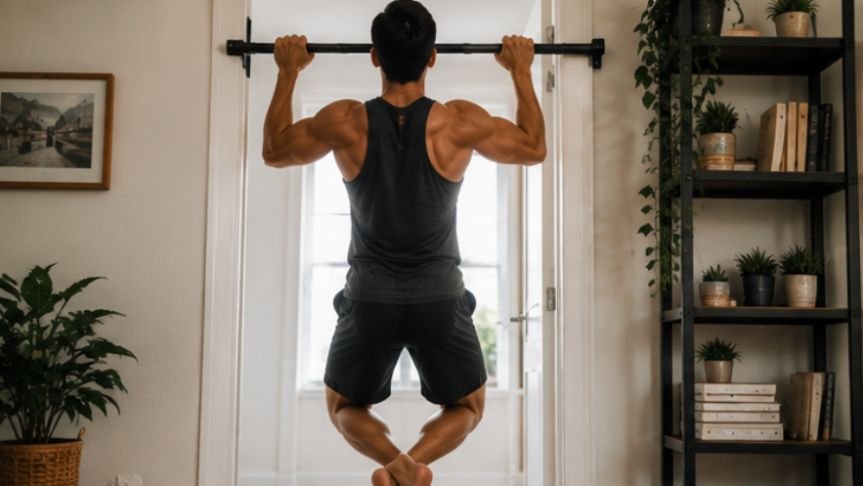
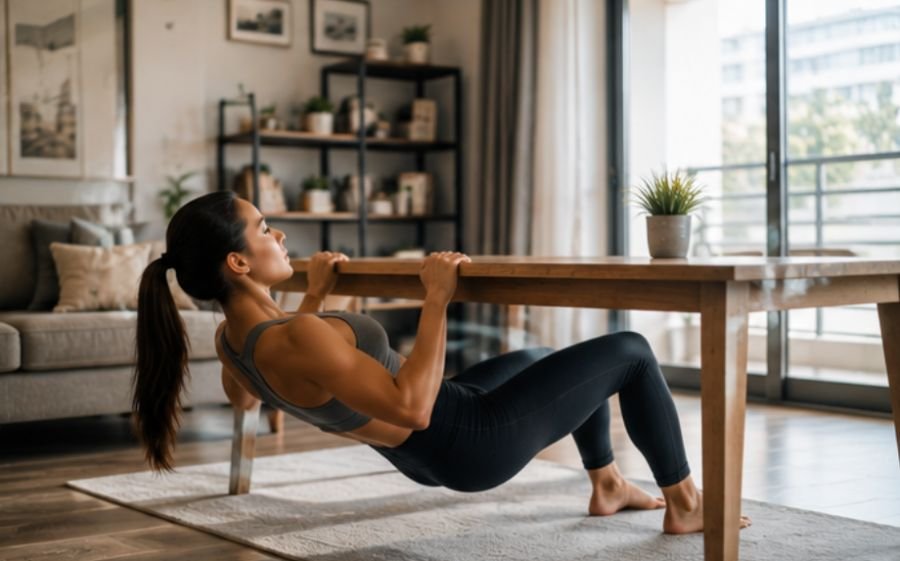
    Inverted Row

    Lie beneath a professionally secured low bar or a truly stable table. Grip the support, straighten your body, and pull your chest upward by driving your elbows back.

    Lower slowly. Bent knees are easier, while straight legs are harder. Never use weak doors, loose sheets, or uncertain anchors.

    Scapula Push-Up

    Begin in a high plank with straight arms and hands under your shoulders. Let your chest sink slightly as your shoulder blades move together.

    Push the floor away until the shoulder blades spread apart. Keep your hips steady and complete ten to fifteen controlled repetitions.

    Floor Or Wall Slides

    Stand against a wall or lie on the floor with bent knees. Place your arms in a goalpost shape and keep your ribs controlled.

    Slide your arms upward without shrugging or arching. Move only through a comfortable range and complete eight to twelve repetitions.

    How To Do Bodyweight Back Exercises At Home

    How To Do Bodyweight Back Exercises At Home

    A useful routine needs a clear order, good form, and gradual progression.

    Prepare Your Body

    Begin with three to five minutes of gentle movement. Thoracic spine mobility exercises can help prepare your mid-back for smoother rotation, reaching, and shoulder movement.

    Roll your shoulders, reach overhead, rotate your upper back carefully, and practice easy bird dogs. The warm-up should prepare you, not tire you.

    Roll your shoulders, reach overhead, rotate your upper back carefully, and practice easy bird dogs. The warm-up should prepare you, not tire you.

    Choose A Balanced Mix

    Select one lower-back exercise, one upper-back movement, one shoulder-blade drill, and one pulling exercise when secure equipment is available.

    A beginner session could combine supermans, reverse snow angels, scapula push-ups, and bird dogs. Add inverted rows after your setup and technique are dependable.

    Control Every Repetition

    Lift or pull for two seconds, pause briefly, and return for two or three seconds. This slower tempo creates useful tension without momentum.

    End the set when posture changes. Quality beats quantity.

    Build A Weekly Routine

    Consistent training is more useful than one exhausting session. Pairing your exercise routine with best high-fiber foods for everyday meals can also support a balanced daily wellness plan.

    Beginner Plan

    Complete two sets of supermans, reverse snow angels, bird dogs, scapula push-ups, and wall slides. Perform eight to twelve repetitions per exercise.

    Train twice weekly on nonconsecutive days and rest about forty-five seconds between exercises.

    Intermediate Plan

    Perform three sets of reverse snow angels, inverted rows, scapula push-ups, bird dogs, and wall slides. Use eight to fifteen repetitions.

    Make rows harder by straightening your legs or pausing at the top.

    Progress Without Weights

    Your body adapts, so the routine must become gradually more challenging.

    Change One Variable

    Add two repetitions, a longer pause, an extra set, or a slower lowering phase. Change only one factor so you can judge your response.

    Progress when every repetition stays steady. Reduce the challenge when form becomes unstable. Record your repetitions so each future session has a clear, realistic progression target.

    Use Better Leverage

    Longer body positions make many exercises harder. Straight legs challenge inverted rows, while longer arm positions increase the demand of floor raises.

    Increase range only when you can control it. Difficulty should come from muscular tension, not awkward joint positions.

    Common Mistakes To Avoid

    Common Mistakes To Avoid

    Small errors can shift work into your neck, arms, or lower spine.

    Lifting Too High

    Supermans and reverse snow angels need only a small lift. Raising too far often creates unnecessary lower-back pressure.

    Think about reaching long instead of bending backward. Keep your stomach lightly braced and stop when movement loses control.

    Shrugging The Shoulders

    During rows and slides, avoid pulling your shoulders toward your ears. Keep your neck relaxed and guide your shoulder blades down and back. Use fewer repetitions when shrugging begins.

    Ignoring Pain Signals

    Normal muscle effort may feel tiring, but sharp pain, numbness, tingling, or spreading discomfort is different.

    Stop and consult a qualified healthcare professional when symptoms persist, worsen, or interfere with daily activity.

    Frequently Asked Questions

    1. How To Work Out Your Back With Bodyweight?

    Use bodyweight back exercises at home that combine supermans, reverse snow angels, bird dogs, scapula push-ups, wall slides, and secure inverted rows. Together, they train spinal support, shoulder control, and pulling strength.

    2. What Are The Big 3 Exercises For Back?

    For home training, inverted rows, bird dogs, and reverse snow angels form a useful trio. They cover horizontal pulling, spinal stability, and upper-back shoulder-blade control.

    3. How Do I Work Out My Back Without Weights?

    Use slow floor exercises, wall slides, scapular movements, and secure rows. Increase difficulty with longer pauses, controlled tempos, additional repetitions, or harder leverage.

    4. Can You Build Back Muscle Without Weights?

    Yes, especially as a beginner. Muscles respond to tension and progressive overload. Harder angles, rows, pauses, and challenging sets can support growth without traditional weights.

    Strong Back, Better Adventures

    Bodyweight back exercises at home can make your routine balanced, practical, and easier to maintain. Begin with supermans, reverse snow angels, and bird dogs, then add scapular drills and safe inverted rows as your control improves. Train consistently, progress gradually, and respect pain signals. A stronger back supports better posture, smoother movement, and more confidence in daily life.

  • Thoracic Spine Mobility Exercises for a Freer Upper Back

    Thoracic Spine Mobility Exercises for a Freer Upper Back

    Long desk hours can leave your mid-back stiff and reluctant to move. A short routine of thoracic spine mobility exercises can restore smoother rotation, easier overhead reach, and better control. The goal is not dramatic bending. It is movement that supports daily life and training.

    Meet Your Thoracic Spine

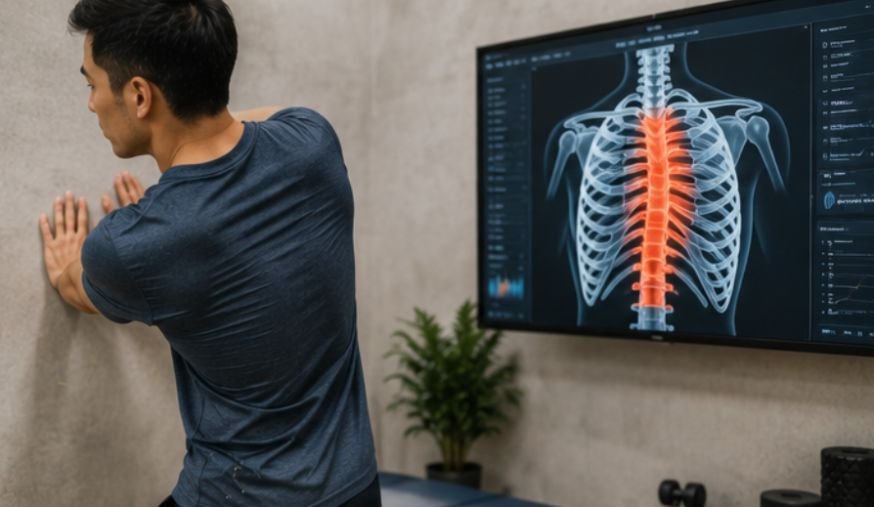
    Your thoracic spine is the middle section of your back, running from the base of your neck to the bottom of your rib cage. Its twelve vertebrae support turning, reaching, bending, lifting, and breathing.

    This region contributes rotation and extension. When it becomes stiff, the neck, shoulders, or lower back may compensate. That can affect overhead lifting, driving, desk work, and sports involving twisting.

    Mobility Is More Than Stretching

    Flexibility describes how far tissues can lengthen. Mobility describes how well you control movement through an available range. A passive stretch may help you reach a position, but mobility work helps you use it.

    Why Your Mid-Back Needs Attention

    Your upper back is the quiet teammate doing more work than it gets credit for. Thoracic spine mobility exercises help it rotate, extend, and support your shoulders without letting your lower back steal the whole show. Better movement can make reaching, lifting, sitting, and turning feel easier.

    Stiffness often develops from spending too long in one position. Sitting, driving, laptop work, and repetitive workouts reduce movement variety. The answer is not having perfect posture. It is changing positions and giving your spine regular movement options.

    Check Your Movement First

    These checks reveal whether rotation or extension feels limited, but they do not provide a diagnosis.

    Try Seated Rotation

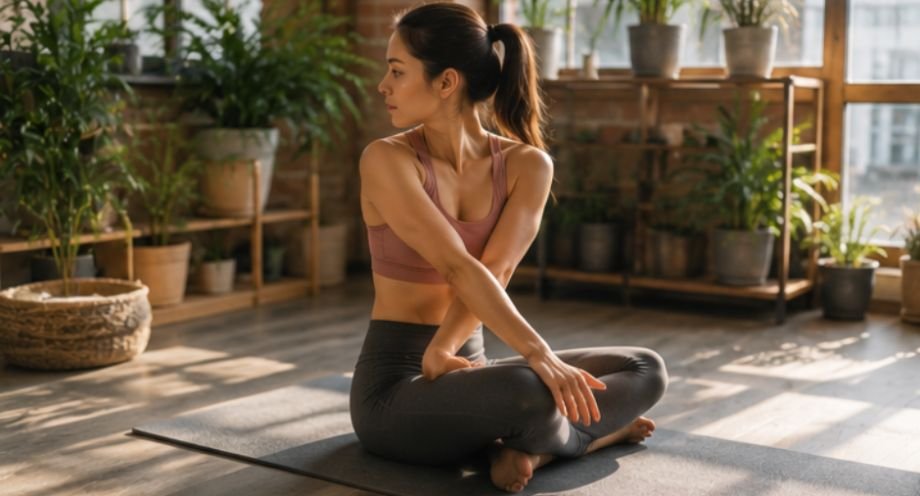
    Sit tall on a chair with both feet flat and your knees together. Cross your arms over your chest, keep your hips forward, and slowly turn your chest to one side. Repeat on the other side.

    Notice whether one direction feels tighter or makes your hips shift. Retest after the routine. Smoother movement matters more than forcing a larger angle.

    Test Overhead Reach

    Stand near a wall with your ribs gently lowered. Raise both arms overhead without arching your lower back or lifting your shoulders.

    Difficulty reaching upward may involve the thoracic spine, shoulders, chest, or lats. It does not prove one area is responsible, but it provides a useful baseline.

    Extension Exercises

    Extension drills help your upper back move backward with control. They are especially useful after long periods of leaning forward.

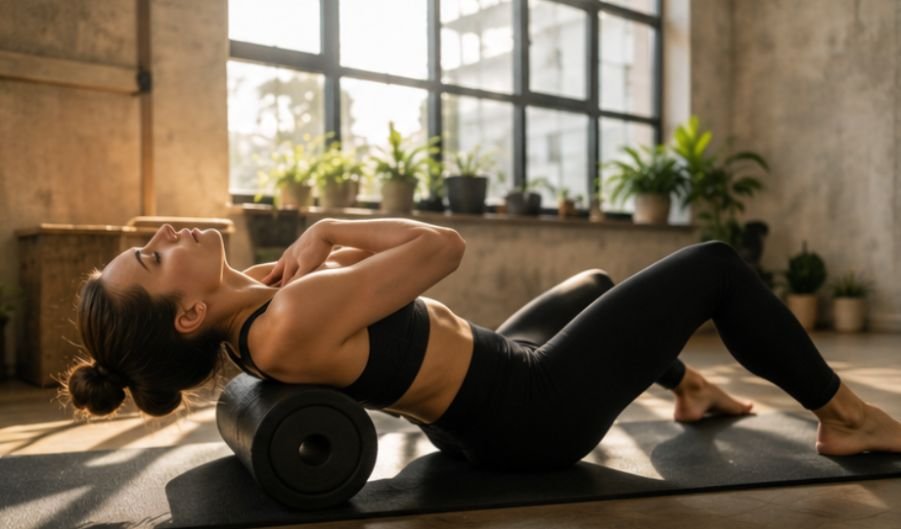
    Foam Roller Extension

    Foam Roller Extension

    Place a foam roller horizontally on the floor and lie back so it rests under your mid-back. Support your head, keep your hips down, and gently arch over the roller.

    Return to neutral and repeat five to eight times. Shift the roller slightly to reach another segment, but keep it away from your neck and lower back.

    Child’s Pose With Reach

    Kneel, sit your hips toward your heels, and reach both arms forward. Press your hands into the floor while allowing your chest to lower gently.

    Take three to five slow breaths. Keep your abdomen lightly engaged. For a side stretch, walk both hands in one direction and breathe into the opposite rib cage.

    Rotation Exercises

    Rotation drills improve your ability to turn through the rib-cage area without twisting excessively through your hips or lumbar spine.

    Open Book

    Lie on your side with your knees bent to ninety degrees and your arms stacked forward. Slowly rotate your top arm and upper body backward while keeping your knees together.

    Follow your hand with your eyes and return slowly. Complete six repetitions per side. You should feel a gentle opening through your chest and mid-back, not lower-back strain.

    Thread The Needle

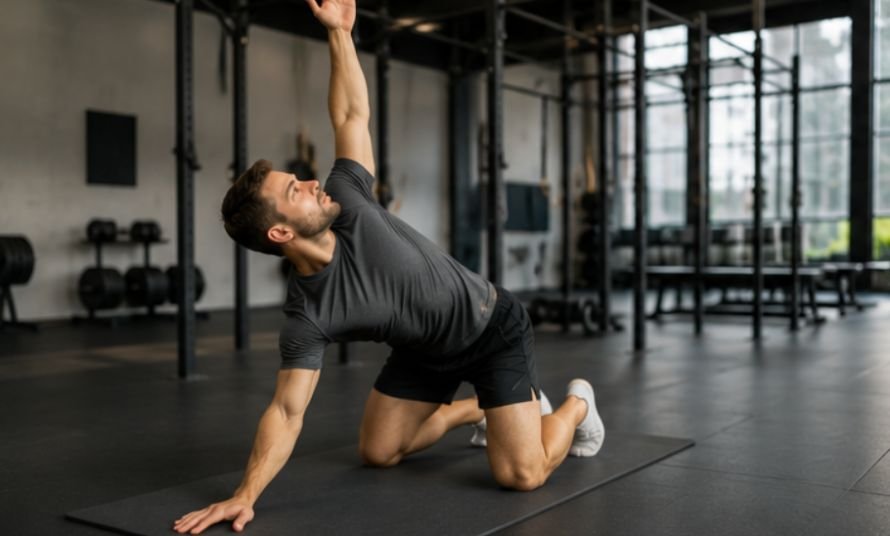
    Start on your hands and knees. Slide one arm underneath your body until your shoulder moves toward the floor, then return and rotate that arm upward.

    Complete six repetitions per side. Keep your hips still, exhale as you rotate, and stop before the movement becomes forced.

    How To Use Thoracic Spine Mobility Exercises

    How To Use Thoracic Spine Mobility Exercises

    Start with eight slow Cat-Cow repetitions to warm your spine, then perform six Thread the Needle repetitions per side. Continue with five foam roller extensions and six Open Book rotations per side.

    Pairing this sequence with a morning stretching routine for flexibility can help reduce overnight stiffness, improve whole-body mobility, and make regular movement easier to maintain.

    Finish with three breaths in Child’s Pose with Reach and eight Wall Angels. Move slowly enough to notice compensation, then repeat your seated rotation or overhead check.

    Practise this sequence three to five times weekly. On busy days, complete one extension drill and one rotation drill for five minutes. Consistency matters more than perfection.

    Fix Common Form Errors

    Good technique keeps each movement focused, controlled, and useful.

    Control Your Lower Back

    Many people create false thoracic extension by arching the lumbar spine and flaring the ribs. Brace your abdomen and reduce the range if your lower back takes over.

    During rotation, stop your pelvis from following your chest. A smaller movement from the correct area is better than a larger compensated movement.

    Breathe And Slow Down

    Holding your breath creates tension. Use a slow exhale as you rotate or move into a comfortable stretch, and keep your jaw and shoulders relaxed.

    Gentle mobility work can also become part of your daily self-care ideas that cost nothing, especially when you need a simple way to reduce stiffness, reset your focus, and feel better without equipment or a paid class.

    Avoid bouncing, pulling your neck, or chasing extreme range. Smooth repetitions improve control and make progress easier to notice.

    Build Strength Around New Range

    Build Strength Around New Range

    Mobility becomes useful when your muscles can control it. Add rows, face pulls, reverse fly variations, carries, and light overhead work to support the upper back and shoulders.

    Choose manageable loads and maintain steady breathing. Strength does not replace mobility, but it helps you use new range during exercise, sports, and daily tasks.

    Know When To Stop

    Mild muscular tension may be acceptable, but sharp pain, numbness, tingling, dizziness, chest pain, or worsening weakness are reasons to stop. Seek professional guidance when symptoms follow an injury.

    A physical therapist or qualified clinician can determine whether stiffness involves the thoracic spine, shoulder, neck, ribs, or another area. Mobility drills should support care, not replace assessment.

    Frequently Asked Questions

    1. How To Increase Mobility In Thoracic Spine?

    Use thoracic spine mobility exercises combining controlled extension, rotation, side bending, breathing, and upper-back strengthening. Practise regularly and retest your movement instead of forcing an aggressive stretch.

    2. What Are The Symptoms Of A Weak Thoracic Spine?

    Possible signs include poor upper-back endurance, difficulty controlling overhead movement, frequent lower-back compensation, and trouble maintaining stable posture during lifting or prolonged sitting.

    3. How To Loosen Up A Stiff Thoracic Spine?

    Start with Cat-Cow, Open Book rotations, foam roller extensions, and Child’s Pose with Reach. Move slowly, breathe normally, and stop before discomfort becomes sharp.

    4. How To Self Mobilize Thoracic Spine?

    Use a foam roller, chair-backed extension, or controlled floor rotation. Keep pressure away from your neck, avoid forceful cracking, and focus on gentle, repeatable movement.

    Let Your Upper Back Join The Party

    A stiff mid-back does not need punishing stretches. The best thoracic spine mobility exercises train extension, rotation, breathing, and control. Start with a self-check, choose drills matching your restriction, and retest afterward. Better movement comes from patient practice, not one dramatic session.

  • Morning Stretching Routine for Flexibility So You Feel Great 

    Morning Stretching Routine for Flexibility So You Feel Great 

    Waking up shouldn’t feel like booting up a rusty machine that takes forever to load. Pouring coffee while your lower back complains makes mornings tough. Doing a morning stretching routine for flexibility right next to your bed unlocks a smoother version of your day without needing heavy gear.

    You don’t need a lengthy workout to feel the difference. Even five to ten minutes of intentional movement can loosen tight muscles, improve circulation, and help your body transition from sleep to activity. Whether you spend your day at a desk, on your feet, or commuting, beginning with gentle mobility prepares your muscles and joints for whatever lies ahead while creating a calm, positive mindset.

    Why Morning Flexibility Matters?

    Consistency matters far more than intensity. A short stretching routine practiced every morning gradually improves flexibility, balance, and posture without placing unnecessary stress on your body. Over time, these small daily improvements can make everyday movements—such as climbing stairs, lifting groceries, or reaching overhead—feel easier and more comfortable. 

    How Overnight Immobility Tightens Muscles

    Lying still for hours in a single sleeping position causes muscles to cool down and adapt a shortened resting length. This overnight compression restricts your natural range of motion and makes simple tasks like tying your shoes feel surprisingly rigid.

    The Connection Between Joints and Daily Energy

    Stiff joints send subtle stress signals to your brain, making you feel mentally exhausted long after your alarm goes off. Gentle elongation acts as a physical wake-up call, releasing feel-good hormones and lubricating your joints for effortless daily movement.

    Why You Need This Habit Today

    Starting your morning stretching routine for flexibility keeps your body fluid and young. Instead of feeling trapped in a stiff shell, you wake up your nervous system, boost blood flow, and dodge those annoying midday aches with zero fuss.

    Tips Before You Begin Your Morning Stretching Routine

    Before starting your stretches, give your body a moment to wake up naturally. Take several slow, deep breaths and avoid jumping immediately into aggressive movements. Since your muscles are cooler after sleeping, gentle, controlled motions are much safer and more effective than bouncing or forcing deeper stretches.

    Wear comfortable clothing that allows unrestricted movement, and perform your routine on a yoga mat or another supportive surface. Focus on breathing steadily throughout every exercise because controlled breathing helps muscles relax and improves flexibility. If a stretch causes sharp pain instead of mild tension, reduce the range of motion or stop altogether. The goal is to wake up your body—not push it to its limits.

    Most importantly, listen to your body each morning. Some days you may feel looser than others, and adjusting your routine accordingly helps build a sustainable habit.

    Stretching should support your energy rather than become another demanding task on your schedule. Understanding how balancing work and recovery helps stay productive can encourage you to combine movement with adequate rest, helping your body remain active without becoming physically or mentally drained.

    Spine and Core Waking

    Spine and Core Waking

    Cat-Cow Spine Awakening

    Begin your session on your hands and knees in a comfortable tabletop position on a soft mat. Inhale deeply as you drop your belly toward the floor and look up gently toward the ceiling. Exhale completely as you round your spine upward toward the sky, tucking your chin and repeating this fluid motion for ten smooth repetitions.

    Move slowly with your breathing rather than rushing through the repetitions. This exercise gently mobilizes every segment of your spine while encouraging better posture throughout the day.

    Thread the Needle

    If your shoulders feel especially tight, pause for an extra breath before switching sides. The stretch can also relieve tension caused by prolonged computer or smartphone use.

    Tight hip flexors are especially common among people who sit for long periods. Stretching them regularly helps improve walking mechanics and reduces unnecessary strain on the lower back.

    Lumbar Rotation for Back Release

    Lie flat on your back with your knees bent and your feet planted firmly on the floor. Gently drop both knees together from one side to the other in a slow windshield wiper motion for sixty seconds. This simple movement releases lower back tension and preps your core for the day ahead.

    If your shoulders feel especially tight, pause for an extra breath before switching sides. The stretch can also relieve tension caused by prolonged computer or smartphone use.

    Lower Body and Hips

    Lower Body and Hips

    Hip Flexor Lunge Stretch

    Step one foot forward into a comfortable low lunge while keeping your back knee resting on the floor. Press your hips forward gently while keeping your chest lifted high to stretch the front of your hip for thirty seconds. Switch sides carefully to ensure balanced mobility through your lower half.

    Half-Kneeling Hamstring Stretch

    Shift your weight backward smoothly from your low lunge position until your front leg straightens out completely. Point your toes upward toward the ceiling and hinge forward gently from your hips for thirty seconds per side. This stretch targets tight hamstrings and improves overall leg flexibility.

    Upper Body and Final Release

    Upper Body and Final Release

    Morning mobility is also a useful opportunity to address posture habits that build up during desk work, driving, or frequent phone use. Learning how to fix rounded shoulders can help you combine chest-opening stretches with upper-back strengthening for better shoulder alignment and more comfortable movement.

    Thread the Needle Upper Back Relief

    Return to your hands and knees and slide one arm underneath your chest to reach across the floor. Allow your shoulder and the side of your head to lower gently toward the mat for twenty seconds per side. This targets your upper back and shoulder blades to melt away desk posture tension.

    Child’s Pose Final Release

    Push your hips all the way back onto your heels while extending your arms far forward on the floor. Rest your forehead comfortably on your mat and take five deep, slow breaths to finish your session. This calming posture signals to your nervous system that you are centered and ready for the day.

    Frequently Asked Questions

    1. Is it good to stretch as soon as I wake up?

    Yes, gentle stretching wakes up your nervous system, improves blood circulation, and releases overnight muscle tension, provided you move slowly and avoid forcing cold joints into deep ranges.

    2. What is the 5-5-5-30 morning workout routine?

    It is a structured fitness trend featuring intervals of core, upper body, and lower body movements, though dedicated flexibility routines focus primarily on mobility rather than intense conditioning.

    3. Does stretching help morning stiffness?

    Targeted mobility work increases synovial fluid production in your joints, which directly lubricates them and reduces that stiff, groggy feeling after sleeping.

    4. Is stretching a good morning routine?

    It is one of the best habits to build because it requires zero equipment, takes under ten minutes, and sets a calm, healthy tone for the entire day.

    Stretch Into Greatness Today

    Embracing a consistent morning stretching routine for flexibility bridges the gap between groggy sleep and vibrant daily energy. Spending just a few minutes unlocking your joints transforms how you move, feel, and conquer your daily tasks with absolute ease.

  • Loosen Up With These Stretches for Lower Back Stiffness

    Loosen Up With These Stretches for Lower Back Stiffness

    A stiff lower back can make standing up, tying your shoes, or reaching for a cupboard feel harder than expected. My go-to approach is not aggressive bending. It is a controlled routine of stretches for lower back stiffness that restores movement, relaxes tight muscles, and helps the body feel more comfortable during activity.

    Key Takeaways

    • Gentle movement works better than forcing a deep stretch.
    • Hold most positions for 20 to 30 seconds.
    • Stretch the hips, glutes, and hamstrings too.
    • Use slow breathing to reduce muscle tension.
    • Stop if pain feels sharp, spreading, or worse.

    Why This Routine Beneficial?

    A stiff back can make even picking up a sock feel dramatic. That is why stretches for lower back stiffness matter. They may improve mobility, reduce muscle guarding, and make daily movement feel less restricted. The goal is not extreme flexibility but also to inculcate self care habits. It is easier movement, better control, and less hesitation.

    Why Your Lower Back Feels Tight

    Lower-back stiffness rarely comes from one muscle. Long sitting, hard workouts, awkward sleep positions, limited hip mobility, and reduced activity can all contribute. The lumbar area may tighten because nearby muscles are not sharing movement well.

    Sitting Limits Natural Motion

    Hours at a desk keep the hips bent and the spine in one position. The hip flexors may tighten, the glutes may become less active, and the lower back may compensate.

    Stand every 30 to 60 minutes and walk briefly. Small movement breaks are easier to maintain than one long evening session.

    Tight Hips Affect The Back

    The hips, glutes, and hamstrings control the pelvis during walking, bending, and lifting. When these areas feel restricted, the lower back may move more than it should.

    A balanced routine should include hip flexor, glute, and hamstring stretches. This often feels more useful than repeatedly pulling on the lower back alone.

    Morning Stiffness Needs Patience

    Your back may feel less mobile after hours of sleep. Jumping into a deep forward bend can feel uncomfortable, so begin with small movements. Pelvic tilt exercises, knee rolls, and a short walk are useful first steps.

    Prepare Before Stretching

    Simple checks make the routine safer. Stretching should create mild tension, not pain or pressure.

    Prepare Before Stretching

    Use A Comfortable Range

    Keep every movement within a range where you can breathe normally. Aim for gentle pulling at around two or three out of ten in intensity.

    Move slowly. Avoid bouncing, jerking, or holding your breath because these habits may increase muscle guarding.

    Watch For Warning Signs

    Stop and seek medical advice for severe pain, leg weakness, groin numbness, bowel or bladder changes, fever, unexplained weight loss, or pain after a serious fall.

    Radiating pain, tingling, or worsening symptoms also need professional assessment.

    How To Do Stretches for Lower Back Stiffness

    These movements follow a sequence, starting with gentle spinal motion before longer hip and leg stretches. Use a mat, move slowly, and rest whenever needed.

    Knee-To-Chest Stretch

    Lie on your back with your knees bent and feet flat. Bring one knee toward your chest while holding behind the thigh or over the shin.

    Hold for five seconds, release, and switch sides. Repeat two or three times per leg. Bring both knees inward only if comfortable.

    Child’s Pose

    Kneel with your big toes close together and knees comfortably apart. Sit your hips toward your heels while reaching your arms forward.

    Hold for 20 to 30 seconds and breathe into your ribs. Use a cushion if needed, and skip the position if kneeling hurts.

    Cat-Cow Stretch

    Begin on your hands and knees. Exhale as you round your back toward the ceiling and tuck your chin. Inhale as you soften your stomach and lift your chest.

    Repeat eight to ten times smoothly. Keep the range comfortable and avoid dropping heavily into the lower back during Cow.

    Lower Back Rotational Stretch

    Lie on your back with your knees bent and feet flat. Keep your shoulders on the floor and slowly let both knees move toward one side.

    Hold for 10 to 20 seconds, return to the center, and switch sides. Use a pillow under the knees if needed.

    Figure-Four Glute Stretch

    Lie on your back and cross one ankle over the opposite thigh. Hold behind the supporting thigh and draw the leg toward you.

    Hold for 20 to 30 seconds before changing sides. Keep the crossed foot flexed and stop if the position causes knee pain or discomfort.

    Hip Flexor Stretch

    Kneel with one foot forward and padding beneath the back knee. Stand tall, tighten the glute on the kneeling side, and shift forward slightly.

    Hold for 20 seconds, then switch sides. Avoid arching the lower back. You should feel the stretch at the front of the hip.

    Supported Hamstring Stretch

    Supported Hamstring Stretch

    Lie on your back and loop a towel around one foot. Lift that leg while keeping the knee slightly bent.

    Hold for 20 seconds per side. Do not pull the leg as high as possible. Keeping the lower back relaxed matters more than straightening the knee.

    Build A Ten-Minute Routine

    Start with one minute of walking, followed by pelvic tilts and knee rolls. Continue with knee-to-chest, Cat-Cow, and Child’s Pose. Finish with the figure-four, hip flexor, and hamstring stretches.

    Use these stretches for lower back stiffness once daily or after long sitting. Consistency matters more than intensity, so choose a routine you can repeat comfortably.

    Match It To Your Day

    For morning stiffness, focus on pelvic tilts, knee rolls, and Cat-Cow. After desk work, prioritize walking, hip flexor stretching, and gentle rotation.

    After training, stretch the glutes and hamstrings gently. Choose movements that improve comfort without increasing symptoms.

    Support Mobility With Strength

    Stretching may ease temporary tightness, but strength helps the body manage movement. Add bridges, bird dogs, and bodyweight squats on separate days once comfortable.

    Walking, position changes, and resistance training make mobility more useful. The goal is a back that feels capable, not simply flexible.

    Frequently Asked Questions

    1. How Do I Loosen A Stiff Lower Back?

    Begin with stretches for lower back stiffness such as pelvic tilts, knee rolls, knee-to-chest movements, and Cat-Cow. Move gently, breathe slowly, and repeat consistently instead of forcing a deeper range.

    2. How To Decompress A Tight Lower Back?

    Lie on your back with your calves supported on a chair and breathe slowly for several minutes. This may relax surrounding muscles, but avoid forceful hanging or traction without professional guidance.

    3. What Causes Extreme Tightness In The Lower Back?

    Extreme tightness may result from prolonged sitting, muscle guarding, overtraining, limited hip mobility, strain, joint irritation, or nerve-related issues. Severe or persistent symptoms need professional assessment.

    4. Why Is My Back So Inflexible?

    Back inflexibility can come from inactivity, repeated postures, tight hips or legs, fear of movement, previous injury, or natural anatomy. Gradual mobility and strength work may improve movement over time.

    Loosen Up And Move On

    The best stretches for lower back stiffness are gentle, repeatable, and practical. Start with small spinal movements, include the hips and glutes, and avoid chasing extreme flexibility. A calm ten-minute routine can improve comfort and confidence, but worsening pain, unusual symptoms, or lasting stiffness should be discussed with a healthcare professional.

  • Wondering How To Fix Rounded Shoulders? Try 10 Min Routine

    Wondering How To Fix Rounded Shoulders? Try 10 Min Routine

    Long hours at a laptop can make the chest tight and the upper back tired. That forward slump often appears slowly, so it is easy to ignore until shirts hang differently or shoulder movement feels restricted. Learning how to fix rounded shoulders starts with small, consistent changes rather than forcing the body into an uncomfortable pose.

    Here is why learning how to fix rounded shoulders deserves attention before the slump becomes your unofficial signature pose. Forward shoulder positioning can make overhead reaching, pressing, pulling, and deep breathing feel less comfortable, especially after long periods of sitting.

    What Rounded Shoulders Mean?

    Rounded shoulders describe a resting position where the shoulders sit forward, the upper arms rotate inward, and the shoulder blades spread apart. The head may also drift forward during phone use, desk work, driving, gaming, or reading.

    This position can be flexible and habit related, but it may also reflect pain, injury, spinal shape, or limited shoulder movement. A mirror check can offer clues, but it cannot diagnose the cause. Persistent discomfort or major asymmetry needs professional assessment.

    Tight Areas

    The chest muscles often become stiff after prolonged sitting or repeated pressing exercises. The front of the shoulders may also feel restricted, making it harder to raise the arms smoothly without arching the lower back.

    Weak Areas

    The rhomboids, lower trapezius, rear shoulders, and rotator cuff help control the shoulder blades. These muscles may not be truly weak, but they can lack endurance after hours of sitting.

    Check Your Starting Point

    Stand naturally before a mirror with your arms relaxed. Notice whether your palms face backward, your thumbs turn inward, or one shoulder sits higher. Next, raise both arms overhead while keeping the ribs relaxed.

    Watch for lower-back arching, shoulder pinching, or difficulty bringing the arms beside the ears. Repeat after gently lengthening your upper back. Easier movement may suggest that posture and thoracic mobility influence your range.

    Record your starting range and repeat the checks monthly, using comfort and control as progress markers rather than appearance.

    How to Fix Rounded Shoulders Step by Step

    How to Fix Rounded Shoulders Step by Step

    The best method combines mobility, stretching, strengthening, and posture practice. Complete this sequence three to five times weekly. Move slowly, breathe normally, and stop any exercise that causes sharp pain, tingling, numbness, or worsening discomfort.

    Open the Upper Back

    Sit on a sturdy chair with the backrest touching the middle of your upper back. Support your head lightly, lean backward over the chair, then return slowly.

    Complete six repetitions without forcing the neck or flaring the ribs. This thoracic extension drill helps the shoulders reach overhead with less compensation.

    Do the Doorway Stretch

    Bend your elbows to 90 degrees and place your forearms against a doorway. Step forward until you feel a gentle chest stretch. Keep the shoulders relaxed.

    Hold for 15 to 30 seconds and repeat three times. Adjust elbow height for comfort. Mild tension is enough because aggressive stretching may irritate the shoulder.

    Try the Chest Opener

    Stand tall and place loose fists against your lower back. Move the elbows gently backward and slightly upward while keeping the ribs down and chin level.

    Hold for 15 seconds and repeat three times. Avoid forcing the shoulders downward. This quick stretch works well during desk breaks.

    Perform Wall Angels

    Stand with your back and head near a wall, feet slightly forward, and arms in a goalpost shape. Slide the arms upward while keeping the ribs controlled and shoulders relaxed.

    Complete three sets of 10 repetitions. Your hands do not need to stay against the wall. Use a pain-free range without shrugging or arching.

    Practice Scapular Retraction

    Sit or stand tall. Draw the shoulder blades gently back and down, as though holding a pencil between them. Keep the neck loose.

    Hold for five seconds and repeat 10 times. The squeeze should feel controlled, not aggressive. Do not maintain this position all day.

    Add Band Pull-Aparts

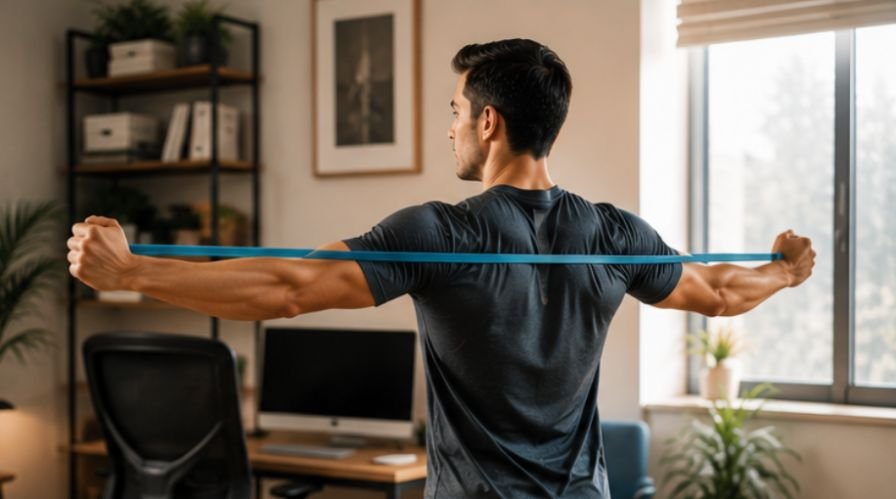
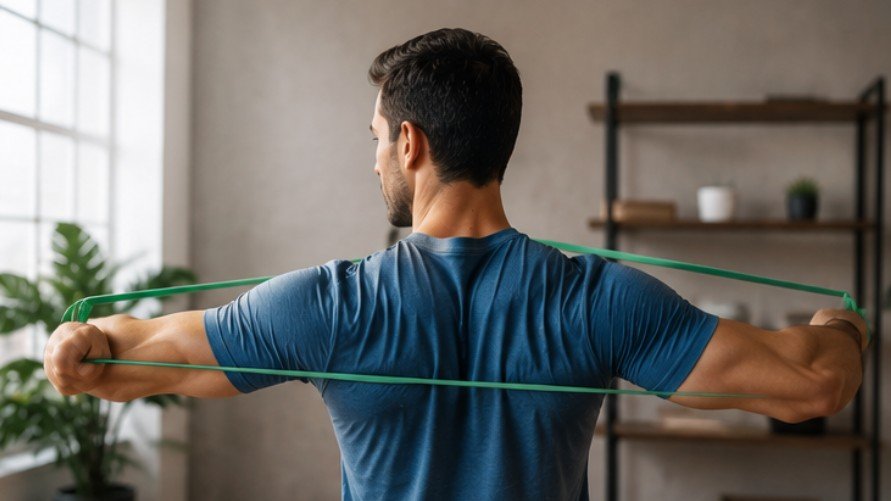
    Hold a light resistance band at chest height. Pull it apart until the arms open comfortably, then return slowly. Keep the shoulders low and ribs stacked.

    Perform two sets of 10 to 12 repetitions. Start light because excessive resistance often causes shrugging and poor form.

    Improve Daily Habits

    Improve Daily Habits

    Exercise helps, but daily routines determine how often the body returns to a slumped position. Small changes during work, phone use, and rest make the plan more effective.

    A gentle wall pilates workout for beginners can also support better posture by improving core control, shoulder stability, and body awareness without placing excessive strain on the joints.

    Take Desk Breaks

    Stand, walk, stretch, or change tasks every 30 to 60 minutes. A short break can include shoulder rolls, a chest opener, or several overhead reaches.

    Use reminders until the habit becomes automatic. Even one minute reduces time spent in a fixed forward position.

    Raise Your Screen

    Position the computer screen near eye level and close enough to read without pushing the head forward. Keep the keyboard and mouse within easy reach.

    Raise the phone toward your face instead of dropping your chin. Alternate hands and avoid holding the device low during long scrolling sessions.

    Avoid Common Mistakes

    Avoid Common Mistakes

    Stretching the chest without strengthening the upper back may provide temporary relief but rarely changes the whole pattern. The body needs mobility and muscular endurance.

    Avoid forcing the shoulders back, using heavy bands too soon, or training through pain. Posture braces may offer reminders, but they do not build strength.

    Know When to Get Help

    Seek advice for persistent pain, numbness, tingling, arm weakness, breathing difficulty, recent trauma, severe headaches, or a rigid spinal curve. Major shoulder asymmetry also needs assessment.

    Remember that recovery also involves respecting your physical and mental limits. Practising healthy boundaries as form of self-care can help you create sustainable exercise habits, avoid overtraining, and prioritize rest when your body needs it.

    A physical therapist can evaluate mobility, strength, technique, and daily habits. Individual guidance is especially useful when symptoms continue despite several weeks of careful practice.

    Frequently Asked Questions

    1. Can You Actually Fix Rounded Shoulders?

    Yes, flexible and habit-related rounding can often improve through stretching, strength training, spinal mobility, and better movement habits. Structural curves may not fully change, but treatment can improve comfort and function.

    2. How Long Will It Take to Fix Rounded Shoulders?

    Some people notice easier movement within weeks, while visible changes may take months. Progress depends on consistency, mobility, strength, sitting time, exercise technique, and the underlying cause.

    3. Why Do I Unconsciously Hunch My Shoulders?

    Stress, fatigue, screen habits, weak upper-back endurance, and a poor workstation can encourage hunching. Frequent movement breaks usually work better than constantly forcing the shoulders backward.

    4. Can Sleeping Position Cause Rounded Shoulders?

    Sleeping position alone rarely causes the problem, but an uncomfortable pillow or prolonged side position may increase stiffness. Avoid any position that causes shoulder pain, numbness, or tingling.

    Stronger Shoulders, Happier Posture

    Understanding how to fix rounded shoulders means looking beyond one stretch or quick cue. Open the chest, improve upper-back movement, strengthen the shoulder stabilizers, and change positions throughout the day. Practice consistently, progress slowly, and measure comfort and control. Better posture should support confident movement, not make you worry about standing perfectly.

  • Mastering The Wall Pilates Workout For Beginners At Home

    Mastering The Wall Pilates Workout For Beginners At Home

    Finding a fitness routine that feels both gentle on your joints and deeply effective can sometimes feel like chasing a dream. Juggling hectic daily schedules often leaves zero time for expensive studio classes or heavy gym equipment. 

    That is precisely why a wall pilates workout for beginners has become the ultimate game changer for people wanting to move their bodies without any intimidation. This friendly vertical surface acts like a personal assistant for proper alignment, helping you build core strength right from your living room floor.

    Key Takeaways

    • Low-impact routine using vertical stability.
    • Targets deep core muscles safely.
    • Zero expensive studio equipment needed.
    • Enhances joint flexibility and posture.
    • Perfect for absolute home fitness beginners.

    Why Your Daily Routine Needs This Movement

    Saying goodbye to boring workout regimens is easy when your living room wall can double as a personal gym. Diving into a wall pilates workout for beginners brings pure magic to your physical wellness journey because it provides instant tactile feedback and gentle resistance. You get all the incredible toning benefits without needing a single piece of fancy gear.

    Regular exercise works best when it is supported by balanced nutrition and realistic daily habits. Following a seven-day healthy eating meal plan for beginners can help you organize nourishing meals that complement your movement routine and support steady energy throughout the week.

    Reduce Joint Stress

    Protecting your joints while building strength should always be a top priority for anyone starting a new active lifestyle. Traditional floor exercises can sometimes place awkward pressure on your wrists or lower back. Leaning against a stable flat surface distributes your body weight evenly so every repetition feels safe and supportive.

    Build Confidence as a Beginner

    Starting a fitness journey often brings worries about complex choreography or heavy weights that feel entirely out of reach. This practice removes those mental barriers by utilizing steady vertical support. You can focus entirely on slow and intentional muscle engagement without ever losing your balance.

    Essential Foundational Movements Explained

    Essential Foundational Movements Explained

    Set Up Your First Wall Pilates Session

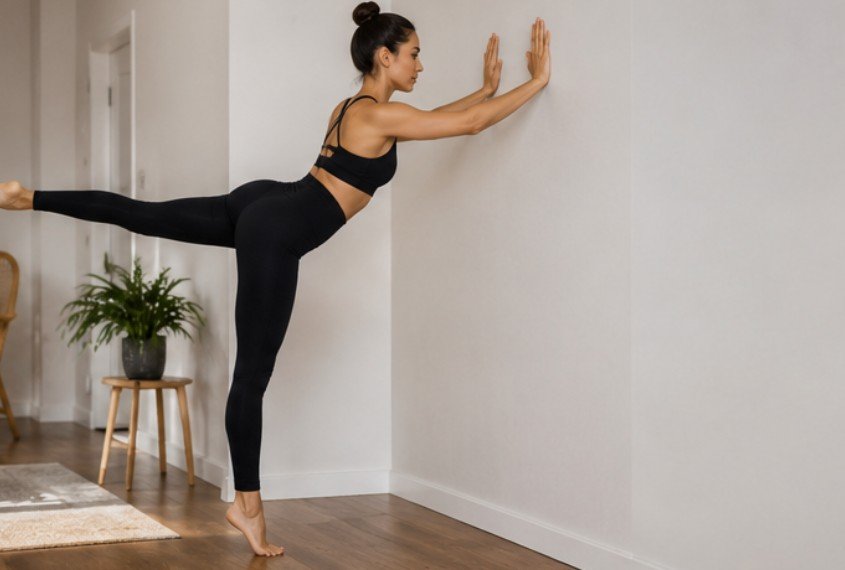
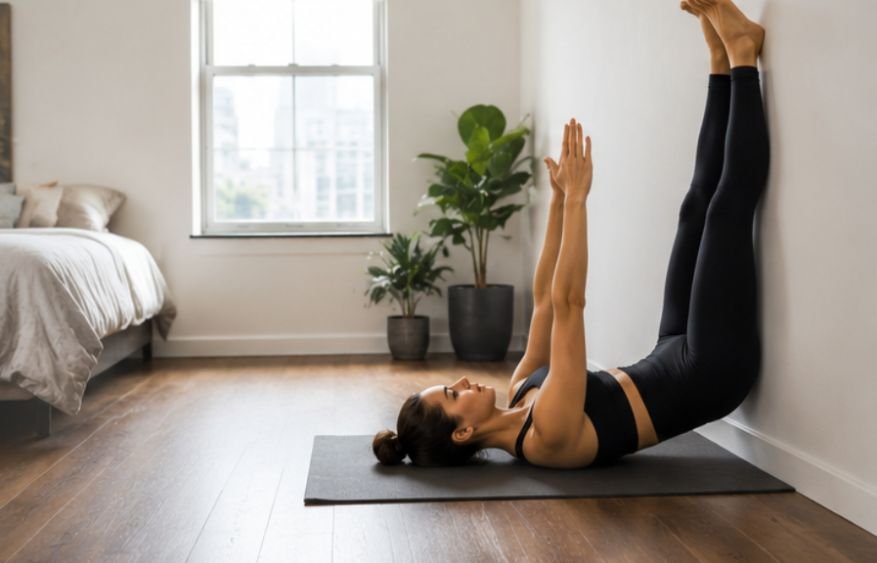
    Getting started with your first session requires nothing more than a clear patch of wall and a comfortable exercise mat. Lie down on your back with your feet resting flat against the vertical surface and your knees bent at a comfortable ninety-degree angle. Press your feet firmly into the wall to peel your hips up into a bridge, lift your heels into a quick calf raise, and roll your spine back down.

    Build Lower Body Strength

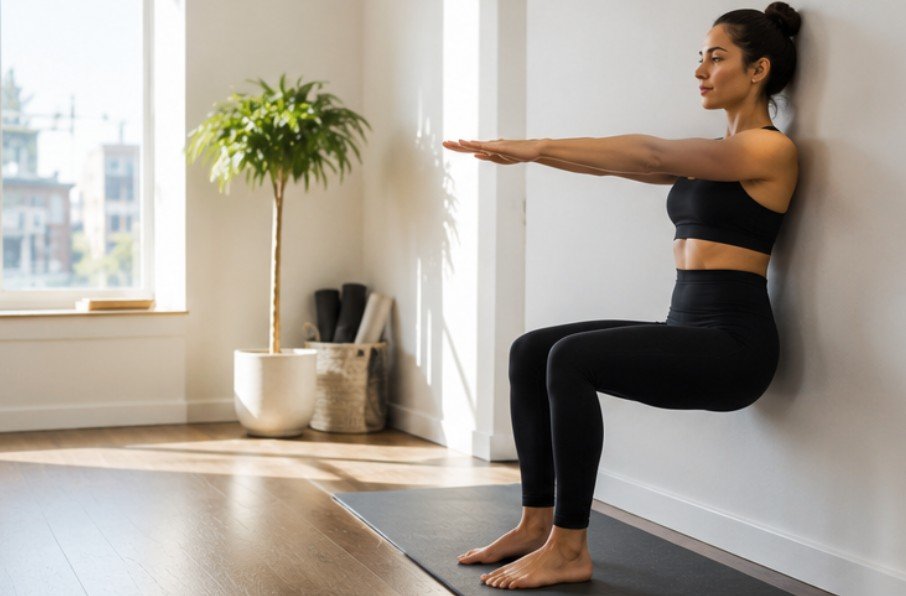
    Building lower body stamina becomes remarkably simple when you incorporate wall sits with calf raises into your weekly schedule. Stand with your back flat against a wall, walk your feet forward, and slide down until your knees form ninety-degree angles. While holding this sit, roll through the balls of your feet to lift your heels up and down.

    Strengthen Your Upper Body and Core

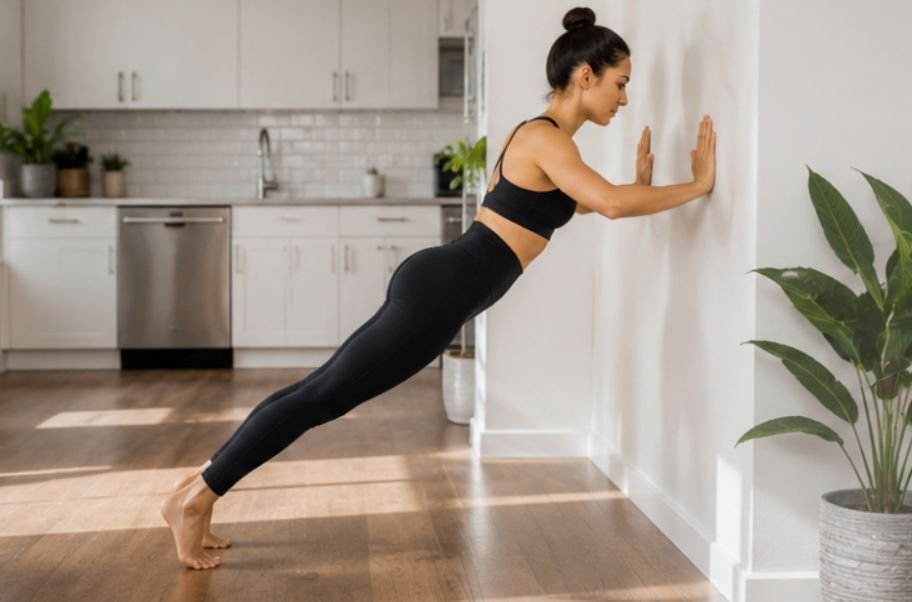
    Upper body strength and core stabilization come together beautifully when you practice single leg knee crunches and wall pushups. Place your hands on the wall at shoulder distance apart with your feet stepped back to create a comfortable leaning angle. Bend your elbows to bring your chest toward the surface and press back out while maintaining a completely straight line.

    Core Engagement And Breathing Secrets

    Core Engagement And Breathing Secrets

    Mindful movement becomes even more effective when it is supported by healthy routines away from the exercise mat. Practising digital self-care habits for a healthier lifestyle can reduce distractions, encourage better focus, and make it easier to stay consistent with short home workouts.

    Engage Your Deep Core

    Deep abdominal stabilization forms the absolute heart of every successful pilates sequence you will ever try. Pull your belly button inward toward your spine as if you are trying to zip up a snug pair of jeans. Maintaining this gentle core brace ensures your powerhouse muscles do the heavy lifting instead of your neck or shoulders.

    Coordinate Your Breathing

    Matching your breath to your physical exertion transforms a basic stretch into an effective conditioning session for your whole body. Inhale deeply through your nose to prepare your body for movement, and exhale completely through your mouth during the hardest part. This rhythm keeps your nervous system calm and focused.

    Move With Control, Not Momentum

    Avoiding momentum is crucial because swinging your limbs bypasses the deep stabilizing fibers entirely during your exercise routine. Moving at a slow and deliberate pace forces your muscles to work harder for better results. Quality always matters far more than quantity when practicing mindful movement.

    Common Mistakes To Avoid Safely

    Common Mistakes To Avoid Safely

    Allowing your spine to lift away from the floor during bridge or crunch movements can strain your lower back. Keep your core tight and continuously press your spine downward to maintain a safe and neutral pelvis position throughout your session.

    Tensing up and holding your breath starves your working muscles of essential oxygen and causes unnecessary physical fatigue quickly. Keep your breathing continuous and fluid, letting each exhale guide you deeper into your movement range without any strain.

    Rushing through repetitions defeats the core purpose of controlled resistance training designed to lengthen and strengthen your physique. Take your time with every single transition to maximize muscle engagement and protect your joints from accidental injury.

    Frequently Asked Questions

    1. Is wall pilates effective for beginners?

    Yes, wall pilates is extremely effective for beginners because it uses a stable wall for tactile feedback, balance, and gentle resistance, making it an ideal low-impact routine to build core strength and improve posture safely.

    2. How many minutes a day should you do wall pilates?

    You should typically practice wall pilates for about ten to twenty minutes a day, focusing on slow and controlled movements to see steady improvements in your overall flexibility, balance, and physical strength.

    3. Is there a 100% free wall pilates app?

    Most dedicated smartphone applications require paid subscriptions, but you can find completely free, high-quality guided wall pilates video tutorials and full-length follow-along sessions directly on platforms like YouTube.

    4. Is there a free wall Pilates workout plan available?

    Yes, many certified fitness instructors and wellness blogs offer free downloadable monthly calendar PDFs and structured beginner routines online that you can easily follow without spending any money.

    Time To Shine And Roll Out Your Mat

    improve balance, and develop better body awareness without needing expensive equipment or advanced fitness experience. With regular practice, these gentle movements can help increase flexibility, enhance posture, and boost confidence in your daily activities. 

    Start at your own pace, stay consistent, and focus on proper form rather than speed. Over time, you’ll notice meaningful improvements that make healthy movement feel both achievable and enjoyable.